

Perfect your oven seasoning workflow for carbon steel
TL;DR:
- Proper oven seasoning requires thin oil layers, thorough drying, and correct temperature cycles.
- Common issues like stickiness result from excess oil, low oven temperature, or insufficient bake time.
- Routine maintenance with hot water and light oiling sustains nonstick properties, reducing need for full re-seasoning.
You’ve done everything right, or so you thought. You oiled the pan, popped it in the oven, and came back to something disappointingly sticky, patchy, or worse, a surface that seems to repel seasoning entirely. Sticky seasoning and uneven results are the most common frustrations for home cooks making the most of a carbon steel pan, and they almost always come down to workflow errors rather than bad luck. This guide walks you through the proven oven seasoning process step by step, covers the most common mistakes with real fixes, and gives you the knowledge to build a genuinely durable, nonstick surface.
Table of Contents
- What you need before you start
- Step-by-step oven seasoning workflow
- Troubleshooting sticky or uneven seasoning
- Maintaining seasoning and ongoing nonstick performance
- What most guides miss about oven seasoning workflows
- Upgrade your cookware experience
- Frequently asked questions
Key Takeaways
| Point | Details |
|---|---|
| Pan compatibility matters | Always check your pan is oven-safe before starting the seasoning process. |
| Thin oil layers prevent stickiness | Apply and buff oil until almost invisible to avoid sticky results. |
| High temperature, multiple cycles win | Season at 230–260°C for one hour, repeating 3–4 times for lasting nonstick. |
| Sticky spots have easy fixes | Gummy seasoning is usually caused by too much oil or low heat and is simple to repair. |
| Care extends nonstick life | Regular cleaning, drying, and light oiling keeps your seasoning strong for years. |
What you need before you start
Having established the value of a solid workflow, let’s start by preparing everything you’ll need. Rushing this stage is where most problems begin. Having the right tools and confirming your pan’s compatibility with oven seasoning will save you a lot of frustration later.
Tools and materials checklist
| Item | Purpose | Notes |
|---|---|---|
| High-smoke point oil | Seasoning medium | Grapeseed, sunflower, avocado, or canola |
| Clean paper towels or lint-free cloth | Applying and buffing oil | Avoid synthetic fibres |
| Oven-safe gloves or thick mitts | Handling a hot pan | Silicone mitts preferred |
| Foil or baking tray | Catching oil drips | Place on rack below pan |
| Dish soap and brush | Initial clean only | For pre-seasoning wash |
| Wire rack or oven rack | Baking pan upside down | Ensures even airflow |
When it comes to choosing a seasoning oil, the smoke point matters enormously. Olive oil, butter, and most animal fats have smoke points too low for oven seasoning and will leave a sticky, brownish residue instead of a hard, polymerised layer. Grapeseed oil is a particularly popular choice because it has a neutral flavour, a high smoke point, and polymerises evenly.
Oven safety is not a given for every carbon steel pan. Not all models are designed to withstand prolonged oven heat, particularly those with plastic-coated or wooden handles. Check the manufacturer’s temperature rating before you proceed. As de Buyer advises, many pans are not oven-safe, and the manufacturer recommends re-seasoning only when needed rather than after every single use. Always follow the specific guidance for your model.
Safety reminder: Before starting any oven seasoning process, confirm your pan’s oven temperature rating from the manufacturer’s documentation. Exceeding this limit can warp the pan or damage handle materials beyond repair.
Brass & Steel pans use single-piece construction with no rivets, welds, or plastic components, which means the entire pan is oven-safe up to 250°C. If you’re using another brand, double-check before proceeding.
Step-by-step oven seasoning workflow
Once you’ve checked your kit and pan, it’s time to get hands-on with the seasoning process itself. The steps below reflect the workflow we recommend at Brass & Steel, refined through extensive testing and feedback from home cooks across Europe.
- Wash the pan with warm water and a small amount of dish soap. New pans often have a protective oil coating applied at the factory. Remove this before seasoning so the oil you apply bonds directly to bare steel.
- Dry thoroughly. Water is the enemy of good seasoning. Use a clean cloth, then place the pan over low heat on the hob for two to three minutes to drive off any remaining moisture. The surface should look completely matte and dry.
- Preheat your oven to 230–260°C (450–500°F). This temperature range is critical. As Misen confirms, temperature benchmarks around 450–500°F with multiple cycles generally improve durability compared to lower-temperature, single-pass approaches.
- Apply a very thin coat of oil to all surfaces, including the outside of the pan, the handle, and the underside. Use your fingertip or a folded paper towel to spread it evenly.
- Wipe off almost all the oil. This is the step most people skip or rush. The pan should look almost completely dry to the eye. Any visible sheen means you’ve left too much oil, and that excess will polymerise into a sticky mess rather than a hard, clear layer. According to Misen’s complete guide, thin wiping to remove visible oil is the single most critical nuance for avoiding tacky seasoning.
- Place the pan upside down in the oven on the middle rack, with a foil-lined tray on the rack below to catch any drips.
- Bake for 30–45 minutes, then turn the oven off and allow the pan to cool inside the oven. Don’t rush this cooling phase by running cold water over a hot pan. Thermal shock can warp even quality carbon steel.
- Repeat 2–3 more times. A single layer is fragile. Three to four cycles build a base seasoning robust enough to handle daily cooking.
Pro Tip: After wiping on the oil, buff the surface one final time with a fresh, dry paper towel until you can’t see any oil at all. The pan should feel faintly tacky, but look completely dry. If it looks shiny or wet, you have too much oil and sticky seasoning is inevitable.
Oven seasoning vs stovetop method
| Factor | Oven seasoning | Stovetop method |
|---|---|---|
| Coverage | Even, whole-pan coverage including outside | Concentrated on cooking surface |
| Control | Consistent temperature via oven thermostat | Requires attention; hot spots possible |
| Time per cycle | 30–45 minutes | 10–15 minutes |
| Best for | Initial base seasoning; deep repair | Top-up seasoning; between-cook maintenance |
| Difficulty | Low once set up | Moderate; requires active monitoring |
For a more detailed breakdown of the oven seasoning method guide or a detailed seasoning walkthrough, Brass & Steel has dedicated resources covering each stage in depth.
Troubleshooting sticky or uneven seasoning
After you follow the workflow, it’s common to hit snags, and here are the fixes you need. Understanding why the problem occurred is just as important as knowing how to fix it.
The most frequent culprits behind sticky or uneven seasoning are:
- Too much oil applied per cycle. Even a thin visible film is too much. The pan must look dry after wiping.
- Oven temperature too low. Below 230°C, the oil won’t fully polymerise and will remain soft, sticky, and prone to peeling.
- Bake time too short. Less than 30 minutes at the right temperature rarely produces a fully cured layer.
- Using the wrong oil. Oils with low smoke points partially burn and leave a soft, dark, unpleasant residue.
- Uneven application. Streaks or pooling of oil during application lead to patchy seasoning that looks mottled or rubs off easily.
Three main pitfalls to avoid: Too much oil, too low a temperature, and too short a bake. Fix any one of these and your results will improve significantly. Fix all three and you’ll rarely struggle with sticky seasoning again. Mionai’s seasoning guide confirms that when seasoning is sticky, the remedy is to scrape or salt-scrub off the gummy layer and re-bake at the recommended higher temperature range.
To remove sticky seasoning safely:
- Let the pan cool completely.
- Use a stiff brush or coarse salt with a paper towel to scrub the sticky area. Salt works as a gentle abrasive without scratching the steel.
- Rinse with hot water and dry immediately on the hob.
- Re-season from step four of the workflow above, paying close attention to oil quantity.
Pro Tip: If sticky seasoning keeps returning, try a different oil. Flaxseed oil, despite being popular online, is notoriously prone to flaking on carbon steel. Stick to repairing seasoning problems with grapeseed or sunflower oil and you’ll see far more consistent results. You can also use the seasoning checklist to methodically identify where your process is going wrong.
Maintaining seasoning and ongoing nonstick performance
A well-seasoned pan is just the start. Here’s how to keep it at peak performance long-term without having to repeat the full oven workflow regularly.
The good news is that maintenance is far simpler than the initial seasoning process. Everyday habits protect what you’ve built and actually continue improving the seasoning over time. As Serious Eats notes, repeated cooking with fat after the initial seasoning often improves nonstick performance more than relying solely on oven baking. Cooking bacon, sautéing vegetables in oil, or frying eggs adds micro-layers of polymerised fat with every use.
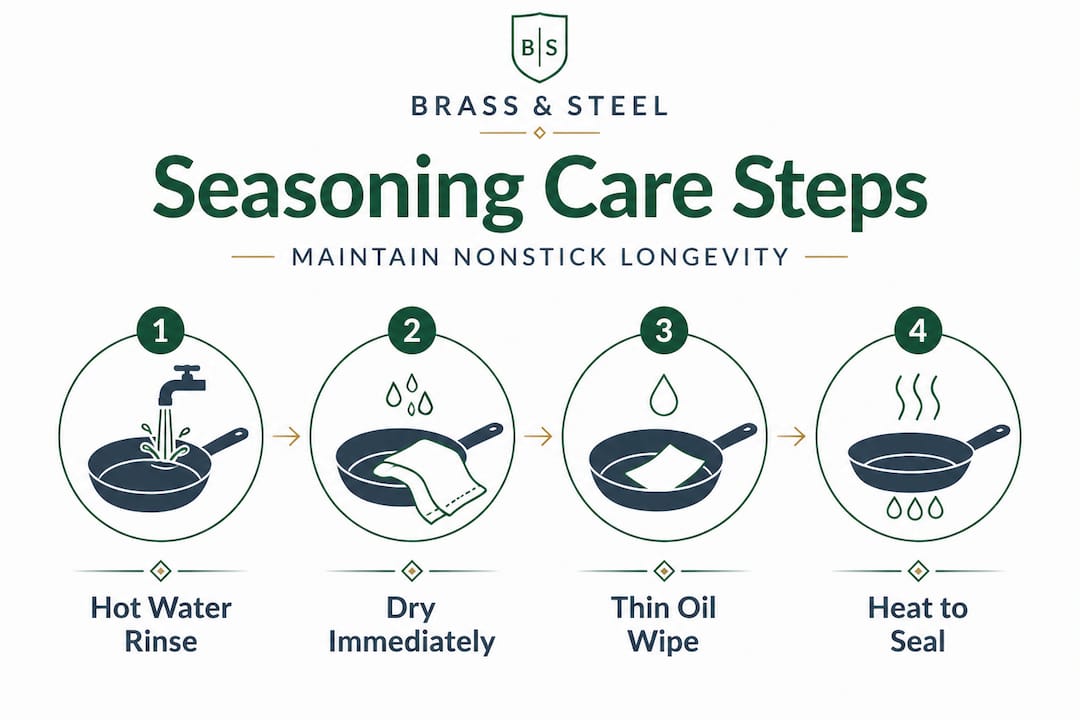
For routine care after each cook:
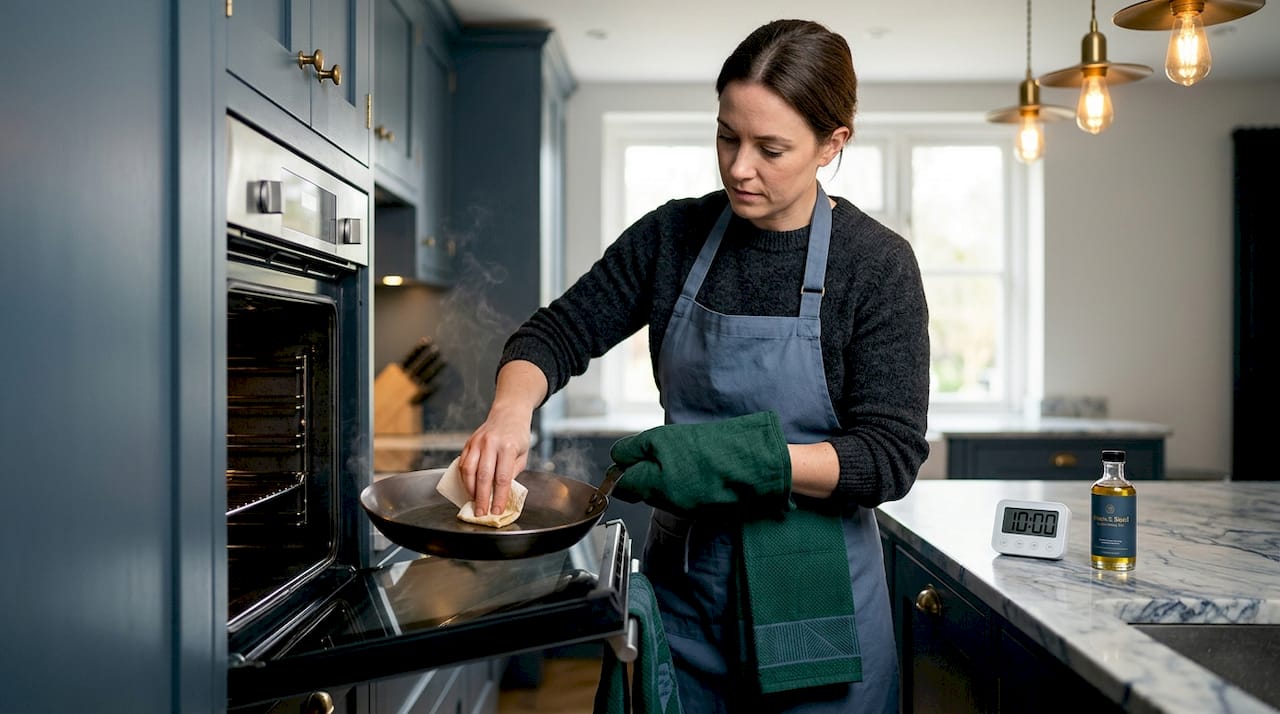
- Clean with hot water and a soft brush or chain-mail scrubber. Avoid soaking the pan or leaving it wet.
- Dry immediately on the hob over low heat for a minute or two. Any residual moisture accelerates rust formation.
- Apply a very light film of oil using a paper towel, then wipe off the excess. The surface should look barely touched, not glossy.
- Avoid sudden temperature changes. Moving a very hot pan directly under cold water can warp the steel, particularly for thinner 3mm models.
Signs that your pan needs a full oven re-season:
- Visible rust spots that won’t wipe off easily
- A dull, grey, patchy surface with little nonstick quality
- Food sticking consistently even with adequate preheating and oil
- A sticky or tacky feel even when the pan is cool and clean
For a complete breakdown of carbon steel care best practices, including how to handle rust and avoiding rust on pans before it takes hold, Brass & Steel provides in-depth guidance. As de Buyer emphasises, the standard recommendation is to re-season only when needed, keeping routine care to hot water, thorough drying, and a light oil wipe.
What most guides miss about oven seasoning workflows
Now that you have the facts, here’s a perspective that most standard seasoning articles avoid entirely.
The vast majority of guides present oven seasoning as a single, universal workflow. Follow these eight steps, they say, and you’ll have a perfect nonstick surface. But experienced cooks and anyone who has worked with multiple pan brands quickly discover that this isn’t the whole picture. Oven calibration varies wildly across European households. A fan-assisted oven at 230°C in Amsterdam will behave differently from a conventional oven at the same setting in Rome. Pan thickness, steel composition, and existing seasoning all affect the outcome. A fully customisable approach, adjusted for your specific oven and pan, will always outperform any rigid formula.
The “never use soap” rule is another area where conventional wisdom has aged poorly. The concern is that soap strips seasoning. In reality, a brief wash with a mild soap, followed by thorough drying and oiling, poses very little risk to a well-established seasoning layer. As Serious Eats’ wok guidance explains, what matters most is thorough drying and not leaving water to sit, not an absolute ban on soap. The obsession with avoiding soap can actually cause problems by encouraging cooks to leave grease and residue in a pan that would benefit from a proper clean.
Perhaps the most overlooked point of all is this: poor preheating is responsible for more sticking incidents than poor seasoning. Even the most beautifully seasoned pan will stick if food is placed into it cold or only partially heated. Proper preheating is essential for food release, and sticking is often misattributed to bad seasoning when the real cause is an inadequately heated pan. If you’re seeing sticking despite good seasoning, try preheating the pan for two full minutes on medium before adding oil or food.
Finally, not every carbon steel pan should be oven seasoned. If your pan has a handle material that isn’t rated for sustained oven heat, or if the manufacturer explicitly recommends against oven use, you should follow a stovetop approach or the manufacturer’s approved method instead. This is a particularly relevant edge case for European cooks who may have older or specialist models. Understanding your specific pan before committing to any workflow is always the first and most important step. For more on unlocking natural nonstick performance from your specific pan, the details make all the difference.
Upgrade your cookware experience
If the oven seasoning process has shown you what carbon steel is truly capable of, the next logical step is ensuring you’re working with a pan built to reward that effort.
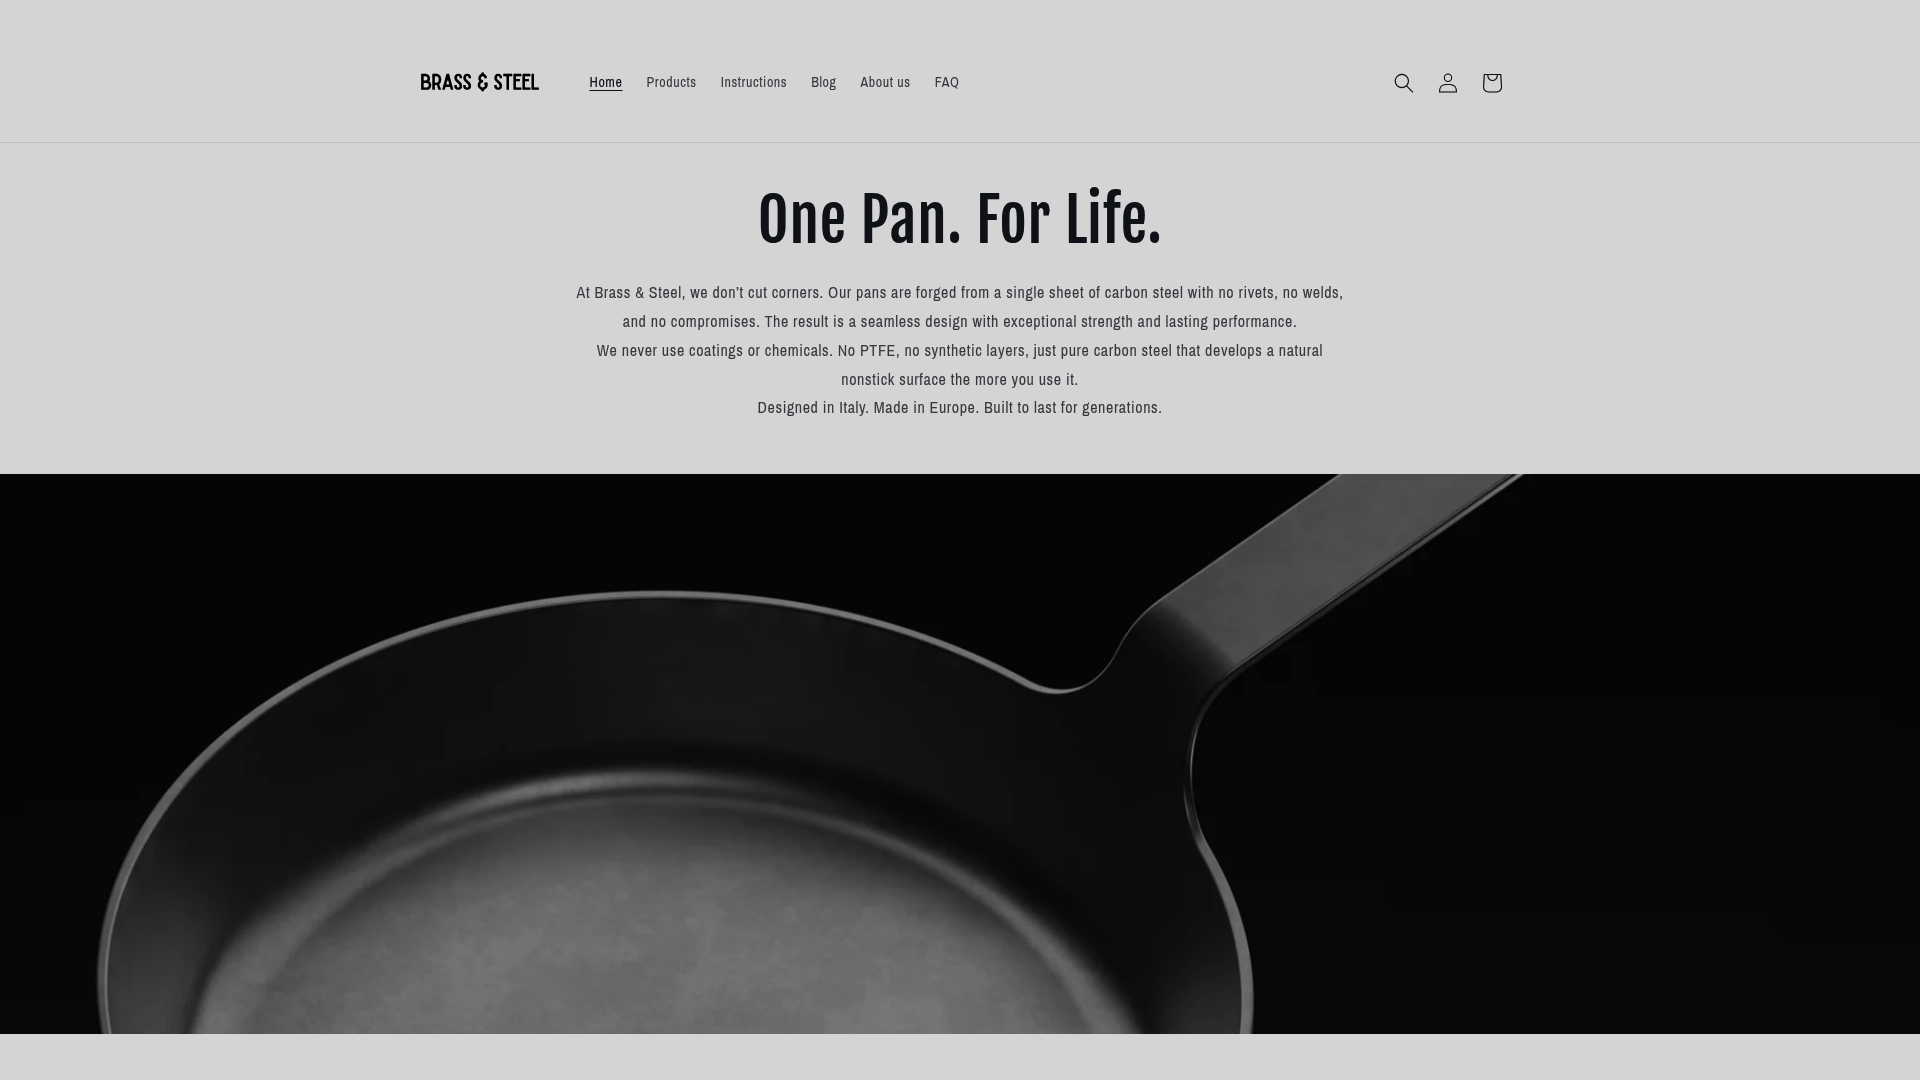
At Brass & Steel, we design our carbon steel sauté pans specifically for cooks who take this seriously. Our single-piece forged construction means no rivets to trap residue, no welds to weaken under heat, and a fully oven-safe design that handles the seasoning workflow without compromise. Whether you’re drawn to the 27 cm pan for everyday cooking or the 30 cm model for larger meals, both are built to develop and hold seasoning beautifully. Explore the complete seasoning guide for further walkthroughs and resources to help you get the most from every cook.
Frequently asked questions
Can I season a non-oven-safe pan with this workflow?
No, you should avoid oven seasoning for pans that aren’t rated oven-safe. Use a stovetop or manufacturer-approved method instead to avoid damaging the pan or handle.
What type of oil works best for oven seasoning?
A high-smoke point oil such as grapeseed, sunflower, or avocado is ideal. Avoid olive oil, butter, or any fat that burns at temperatures below 230°C, as these produce sticky rather than polymerised layers.
How do I fix sticky seasoning after oven seasoning?
Scrub the sticky section with coarse salt or a stiff brush, rinse with hot water, dry thoroughly, then re-bake with far less oil at 230–260°C for at least 30 minutes. The salt-scrub method effectively removes gummy residue without damaging the steel surface beneath.
Is it necessary to completely re-season after each use?
No, routine maintenance requires only hot water, immediate drying, and a thin oil wipe. Oven re-seasoning is only needed when performance drops noticeably, such as when rust appears or food sticking becomes persistent.
Does using soap ruin the seasoning I’ve built up?
Occasional soap use won’t destroy established seasoning as long as you dry thoroughly and oil the pan promptly after washing. What causes real damage is leaving moisture on the surface, not the brief presence of a mild detergent.