

Step-by-step guide to seasoning carbon steel cookware
New carbon steel pans often frustrate home cooks when food sticks or rust appears after the first few uses. Without proper seasoning, your beautiful cookware won’t develop the natural non-stick surface it’s designed for. This guide walks you through every step to build a durable, protective patina that transforms your pan into a reliable kitchen workhorse. You’ll learn exactly which materials to gather, how to apply ultra-thin oil layers, and the heating cycles that polymerise oil into a lasting finish. By following these clear instructions, you’ll master seasoning at home and enjoy decades of exceptional cooking performance.
Table of Contents
- Key takeaways
- What you need to season carbon steel cookware
- Step-by-step initial seasoning process
- Maintaining and troubleshooting seasoning for lasting performance
- Comparing stove top and oven seasoning methods
- How Brass & Steel can help you master carbon steel seasoning
- FAQ
Key Takeaways
| Point | Details |
|---|---|
| Ultra thin oil layers | Apply oil in very thin coats and wipe away excess until the surface is almost dry to prevent a sticky residue. |
| High smoke point oils | Choose rapeseed, grapeseed or sunflower oil because they polymerise reliably at seasoning temperatures above 230°C. |
| Three to five cycles | Repeat heating cycles between three and five times to build a strong base coat. |
| Avoid thick coats | Thick oil layers lead to a sticky gummy patina; keep coats thin and allow patience for best results. |
| Maintenance after use | Clean and dry the pan after cooking and apply a light coating of oil to preserve the patina. |
What you need to season carbon steel cookware
Gathering the right materials before you start makes seasoning straightforward and stress-free. You’ll need your carbon steel pan, a high smoke-point oil, access to an oven or stove, several clean lint-free cloths, and aluminium foil to catch any drips during heating. The oil choice matters significantly because high smoke-point oils popular in Europe, such as rapeseed, grapeseed, or sunflower oil, polymerise effectively at seasoning temperatures above 230°C. These oils are readily available at supermarkets across Europe and perform reliably for building durable patina layers.
Your workspace needs good ventilation because heating oil produces smoke during polymerisation. Open windows or run an exhaust fan to keep air fresh. A clean, dry surface for preparation helps you work efficiently without interruptions.
Pro Tip: Avoid olive oil or animal fats for initial seasoning. They have lower smoke points and create uneven, sticky layers that flake easily during cooking.
Here’s a quick reference table for your seasoning setup:
| Item | Purpose | Notes |
|---|---|---|
| Carbon steel pan | The cookware being seasoned | Must be clean and completely dry |
| High smoke-point oil | Creates polymerised coating | Rapeseed, grapeseed, sunflower (400°F+ smoke point) |
| Oven or stove | Heat source for polymerisation | Oven preferred for even heating |
| Lint-free cloths | Oil application and wiping | Paper towels work but cloth is better |
| Aluminium foil | Catches oil drips | Place on oven rack below pan |
| Ventilation | Removes smoke | Open window or exhaust fan |
Before seasoning begins, thoroughly wash your new pan with hot water and mild washing-up liquid to remove any factory coatings or protective wax. Some manufacturers apply a thin oil layer to prevent rust during shipping, which must come off before you build your own seasoning. Dry the pan completely by placing it on low heat for a few minutes until no moisture remains. Water droplets left behind will prevent oil from bonding properly to the metal surface. For more guidance on selecting the right oils, explore our cookware seasoning oils guide for detailed comparisons.
Step-by-step initial seasoning process
Now that you’ve gathered materials and prepared your workspace, follow these detailed steps to build your first seasoning layers. Each stage matters for creating an even, durable finish.
-
Wash and dry your new pan thoroughly. Use hot water and mild washing-up liquid to remove factory coatings or protective wax. Scrub gently with a soft sponge, then rinse completely. Place the pan on low heat for 3 to 5 minutes until all moisture evaporates. Any remaining water will cause oil to bead up instead of spreading evenly.
-
Apply an ultra-thin layer of your chosen oil. Pour a small amount of rapeseed, grapeseed, or sunflower oil onto a lint-free cloth. Rub the oil over every surface of the pan, including the handle and exterior. The critical step here is wiping away excess oil until the surface looks almost dry and barely glistens. Applying ultra-thin oil layers prevents the sticky, gummy texture that ruins seasoning attempts. Most beginners use far too much oil, so be aggressive with your wiping.
-
Heat the pan in your oven. Preheat your oven to 230 to 260°C (450 to 500°F). Place aluminium foil on the rack below to catch any drips. Put your oiled pan upside down on the middle rack. Heating thin oil layers at 450 to 500°F for 30 to 60 minutes allows the oil to polymerise into a hard, protective coating. The upside-down position prevents oil from pooling in the cooking surface.
-
Let the pan cool completely. After the heating cycle finishes, turn off the oven but leave the pan inside until it reaches room temperature. Rapid cooling can cause warping or uneven seasoning. This cooling period typically takes 45 minutes to an hour.
-
Repeat the process 3 to 5 times. Each additional layer strengthens your seasoning and fills in any gaps from previous cycles. Apply another ultra-thin oil coat, wipe thoroughly, heat for 30 to 60 minutes, and cool. Repeating heating cycles 3 to 5 times builds the durable base coat that makes carbon steel cookware perform beautifully. You’ll notice the pan darkening with each cycle as the patina develops.
Pro Tip: Use an exhaust fan or open a window during seasoning. The smoke produced during polymerisation is normal but can set off smoke alarms if ventilation is poor.
After completing these cycles, your pan will have a dark bronze to black appearance with a smooth, slightly glossy finish. Some colour variation is completely normal and will even out with regular cooking. For a detailed checklist to track your progress, visit our carbon steel seasoning checklist to ensure you’ve covered every step.

Maintaining and troubleshooting seasoning for lasting performance
Proper maintenance keeps your seasoning strong and your cooking experience excellent for years. After each use, rinse your pan with hot water while it’s still warm. For stuck-on food, sprinkle coarse salt into the pan and scrub with a damp cloth or paper towel. The salt acts as a gentle abrasive without damaging your seasoning. Avoid soaking the pan or using harsh detergents, which strip away the protective patina you’ve worked to build.
Dry your pan immediately and thoroughly after washing. Place it on low heat for a minute or two to evaporate any remaining moisture. While the pan is still warm, apply a very thin layer of oil with a cloth, wiping away excess until the surface barely glistens. Using hot water rinse and salt scrub when needed, then drying and lightly oiling after each use, prevents rust and strengthens your seasoning over time.
Common problems have straightforward solutions:
- Sticky residue: You’ve applied too much oil during seasoning or maintenance. Scrub the sticky areas with salt and hot water, dry completely, then re-season with an ultra-thin oil layer.
- Patchy colouring: Uneven colour is completely normal and improves with use. Different areas heat at different rates, creating natural variation. Keep cooking and the patina will become more uniform.
- Food sticking: Your seasoning needs more layers or you’re cooking at incorrect temperatures. Add 2 to 3 more seasoning cycles and ensure your pan is properly preheated before adding food.
- Rust spots: Moisture has reached the bare metal. Rust or sticking indicates need for re-seasoning or improved maintenance practices. Scrub away rust with steel wool, wash, dry, and re-season immediately.
If you notice rust forming or food beginning to stick, address it immediately. Prompt re-seasoning prevents minor issues from becoming major problems. A few quick seasoning cycles restore your pan’s performance completely.
Acidic foods like tomatoes, citrus, or vinegar-based sauces gradually wear away seasoning. This is normal. After cooking acidic dishes, inspect your pan and add a maintenance seasoning layer if needed. High heat searing can also thin your seasoning initially, but as you build up layers over weeks of cooking, your patina becomes increasingly resilient. Store your pan in a dry location with good air circulation. If stacking cookware, place a paper towel between pieces to absorb any moisture. For comprehensive care strategies, review our carbon steel care guide for expert maintenance techniques.
Comparing stove top and oven seasoning methods
Both oven and stove top methods polymerise oil effectively, but each offers distinct advantages for different situations. Understanding when to use each approach helps you maintain your cookware efficiently.
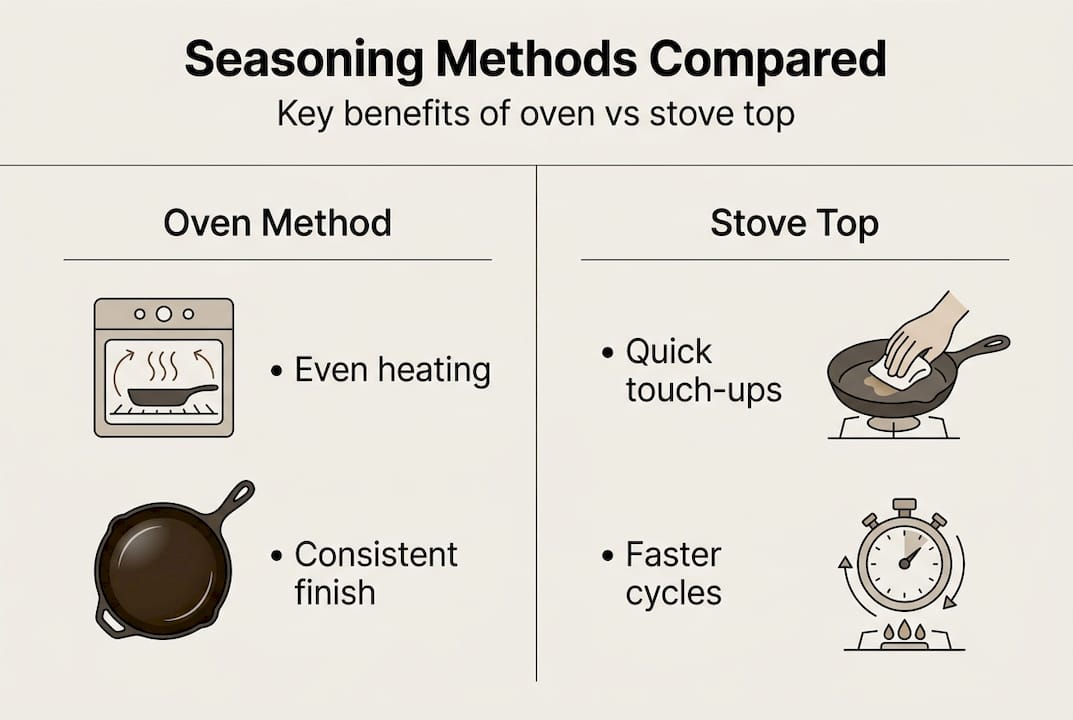
Oven seasoning provides slower, more even heat distribution across the entire pan surface. The consistent temperature ensures uniform polymerisation without hot spots or missed areas. This method works best for initial seasoning when you’re building your first 3 to 5 base layers. The oven method gives more even seasoning and is preferred for initial seasoning because it heats handles and sides as thoroughly as the cooking surface.
Stove top seasoning offers speed and convenience for quick touch-ups after cooking acidic foods or when you notice small bare spots. You can complete a seasoning cycle in 10 to 15 minutes compared to an hour in the oven. However, this method requires careful attention to heat control. Moving the pan around the burner ensures even heating, but beginners often create burnt spots by leaving it stationary.
| Method | Pros | Cons | Duration | Best for |
|---|---|---|---|---|
| Oven | Even heat distribution, hands-off process, seasons entire pan including handle | Longer time, produces more smoke, uses more energy | 60 to 90 minutes per cycle | Initial seasoning, building multiple layers, thorough restoration |
| Stove top | Quick touch-ups, convenient after cooking, less smoke | Requires active attention, uneven heating possible, harder to season handle | 10 to 15 minutes per cycle | Maintenance seasoning, small repairs, quick fixes |
Oil selection impacts results regardless of method. Polymerisation chemistry is consistent across methods; oil choice impacts layer durability and flakiness. Flaxseed oil creates an extremely hard finish but tends to flake with thermal cycling. Rapeseed and grapeseed oils form slightly softer but more flexible layers that withstand temperature changes better. For European home cooks, rapeseed oil offers the best balance of availability, performance, and cost.
Tips for maximising results with each method:
- Oven seasoning: Preheat thoroughly before placing your pan inside. Use the middle rack for even air circulation. Leave the pan in the cooling oven rather than removing it immediately. Run your exhaust fan throughout the process.
- Stove top seasoning: Start with medium heat and gradually increase to medium-high. Move the pan in circular motions over the burner. Tilt to ensure oil reaches the sides. Watch for smoke as your signal that polymerisation is occurring. Let the pan cool completely before handling.
For detailed comparisons and technique refinements, explore our guide on carbon steel seasoning methods to find the approach that fits your cooking routine.
How Brass & Steel can help you master carbon steel seasoning
At Brass & Steel, we specialise in crafting heirloom-quality carbon steel cookware designed for serious home cooks across Europe. Our pans are forged from a single piece of carbon steel, eliminating rivets and welds for seamless strength and easy maintenance. Every pan we produce is engineered to develop a beautiful, natural non-stick patina through proper seasoning.
We understand that mastering seasoning takes guidance and practice. That’s why we’ve created comprehensive resources to support you at every stage. Our detailed seasoning checklist guide breaks down each step with precision, ensuring you build durable seasoning layers from the start. Whether you’re seasoning your first carbon steel pan or maintaining a well-loved piece, our expert tips help you achieve professional results at home. Visit our website to explore our cookware range and deepen your seasoning knowledge with proven techniques from experienced cooks.
FAQ
How often should I season my carbon steel pan?
Initial seasoning requires 3 to 5 cycles before first use. After that, season only when you notice food sticking, rust spots appearing, or after cooking highly acidic dishes. Regular maintenance oiling after each use often prevents the need for full re-seasoning. Most home cooks perform a complete re-seasoning once or twice yearly depending on cooking frequency.
What oils work best for seasoning in Europe?
Rapeseed, grapeseed, and sunflower oils are ideal choices widely available across Europe. All three have smoke points above 230°C, making them perfect for polymerisation. Rapeseed oil offers the best value and performance balance. Avoid olive oil, which has a lower smoke point and creates sticky, uneven layers that compromise your seasoning.
Why does my pan get sticky during seasoning?
Stickiness results from applying too much oil before heating. Excess oil cannot fully polymerise and leaves a tacky residue. To fix this, scrub the sticky areas with hot water and coarse salt, dry thoroughly, then re-season using an ultra-thin oil layer. Wipe aggressively until the surface looks almost dry before heating.
Can I use my pan right after seasoning?
Yes, but initial cooking performance improves with use. Start with high-fat foods like bacon, sausages, or eggs cooked in butter. These dishes add additional seasoning layers naturally. Avoid highly acidic foods like tomato sauce during the first few weeks. Your pan’s non-stick properties strengthen significantly after 10 to 15 cooking sessions.
How do I fix rust spots on my pan?
Scrub rust away using steel wool or a scouring pad with hot water until you reach bare metal. Wash the entire pan with washing-up liquid, dry completely on low heat, then re-season immediately following the initial seasoning process. Prevention works better than cure, so always dry your pan thoroughly and apply a thin oil layer after washing.