

First Use Carbon Steel Pan Steps for Perfect Cooking
A brand new carbon steel pan might look ready for action straight out of the box, but hidden protective coatings and manufacturing residues are standing between you and cooking perfection. For home cooks across Europe, building the foundation for a truly non-stick, high-performing pan starts with thorough cleaning and careful surface preparation. This step-by-step guide gives you the practical know-how and confidence to master your carbon steel pan from first wash to flawless patina.
Table of Contents
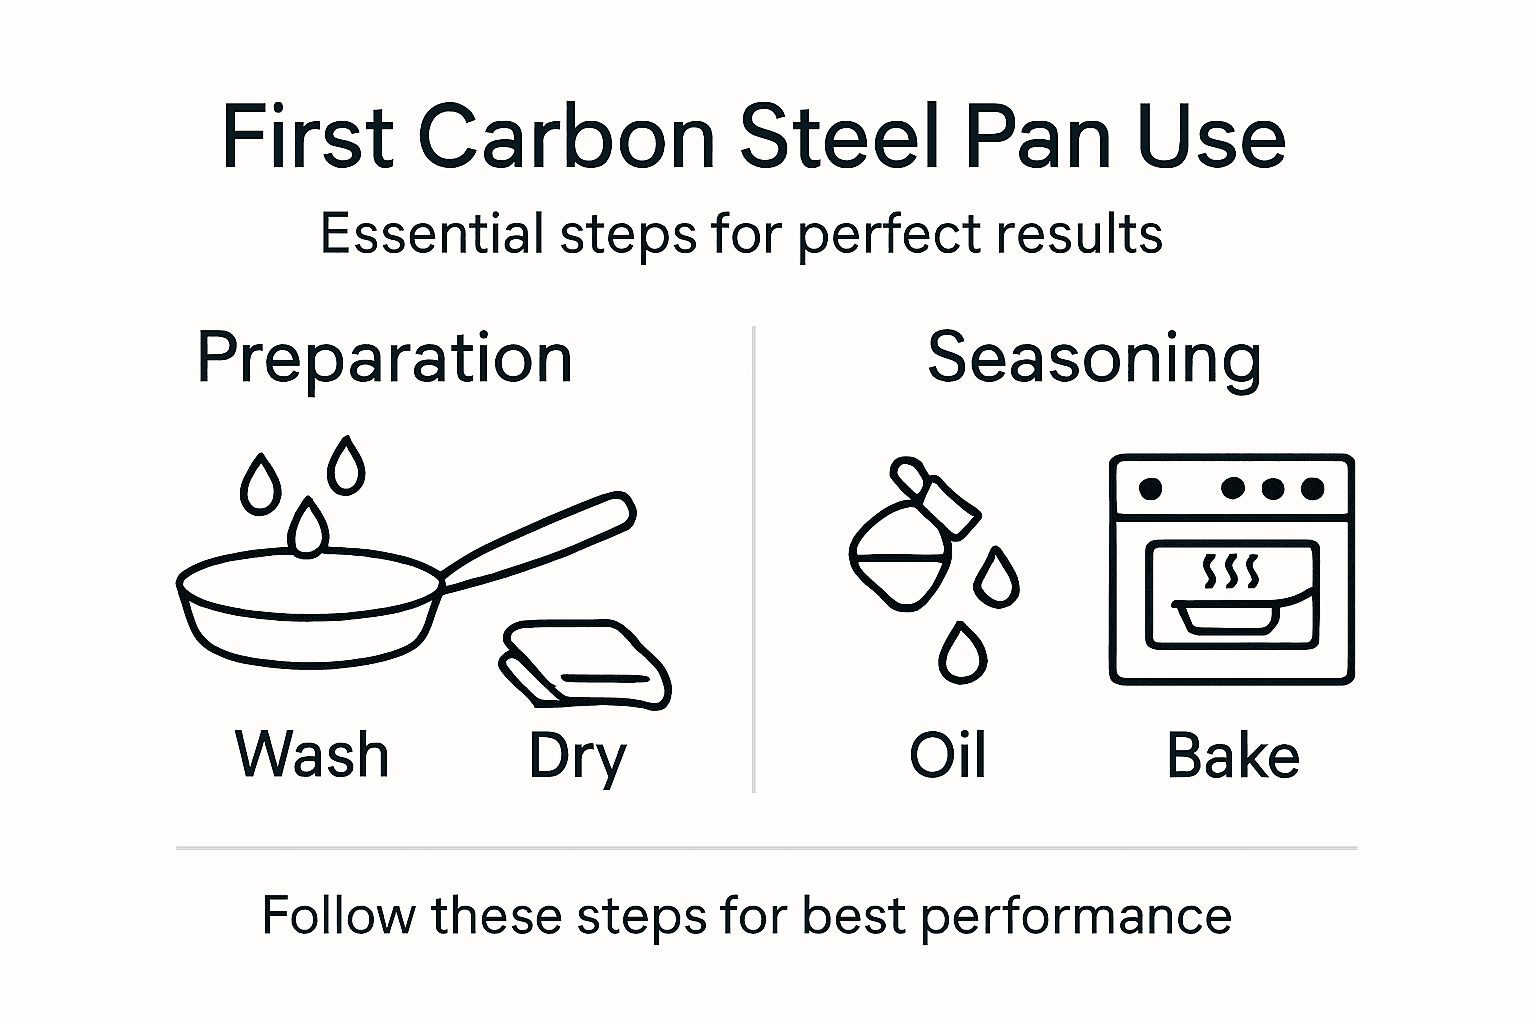
- Step 1: Prepare Your Carbon Steel Pan for First Use
- Step 2: Clean and Dry the Pan Thoroughly
- Step 3: Apply and Bake Seasoning Layers
- Step 4: Check the Surface for Proper Patina
- Step 5: Maintain Your Seasoned Pan After Use
Quick Summary
| Key Point | Explanation |
|---|---|
| 1. Thoroughly Clean Before Use | Wash the pan with hot, soapy water to remove protective coatings and residues before seasoning. |
| 2. Apply Thin Oil Layers for Seasoning | Use a high smoke point oil in a very thin layer to create a proper non-stick coating during the seasoning process. |
| 3. Ensure Complete Dryness | After cleaning, heat the pan to evaporate any residual moisture, which prevents rust before seasoning. |
| 4. Maintain Your Seasoning | After use, clean gently and apply a light coat of oil to strengthen the seasoning and enhance non-stick properties. |
| 5. Inspect the Patina Regularly | Check for a smooth, dark patina to ensure even seasoning; address any issues immediately to maintain performance. |
Step 1: Prepare Your Carbon Steel Pan for First Use
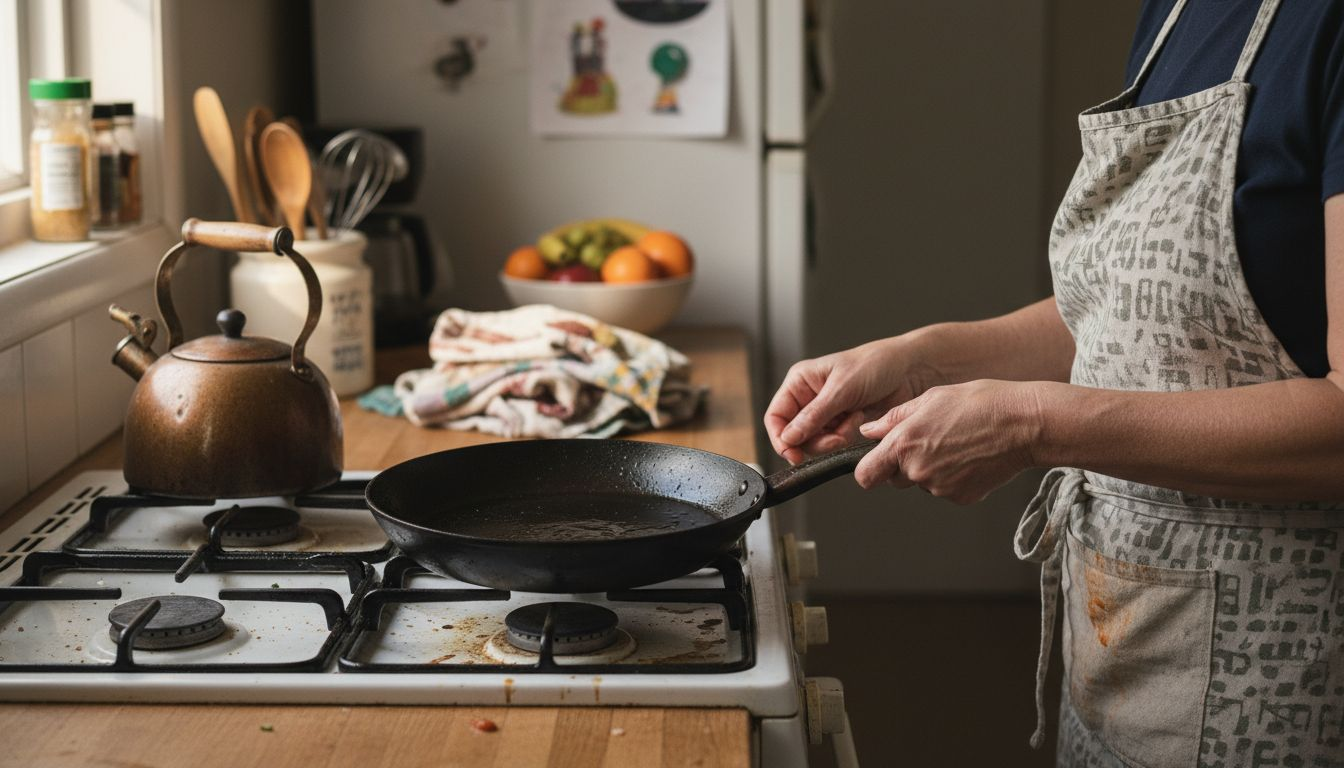
Your new carbon steel pan arrives with a light protective coating from manufacturing. This first preparation step is crucial because it sets up your pan for years of excellent cooking. You’re essentially creating a clean slate and building the foundation for that sought-after non-stick surface that improves with every meal you cook.
Start by giving your pan a thorough wash with hot soapy water and a soft sponge or cloth. Don’t be shy here, you want to remove any manufacturing residues, factory dust, and protective oils that may still be clinging to the surface. Rinse it well under running water until the water runs clear and there’s no slippery residue left behind. This step matters because bare metal requires proper cleaning) before seasoning can bond effectively. Dry your pan completely with a clean kitchen towel, making sure no moisture remains in the corners or along the handle. Moisture is the enemy at this stage, so take your time with this step.
Once your pan is spotlessly clean and completely dry, you’ve removed all the obstacles between the bare metal and what comes next. Some people skip this washing step thinking their new pan is already clean, but you’ll find that manufacturers apply protective coatings that need to come off first. The difference between a properly prepared pan and a rushed one becomes obvious within the first few uses. Your pan is now ready for seasoning, which is where the magic actually happens. The oven seasoning method will give you a solid foundation that only strengthens with cooking.
Pro tip Store your pan in a dry location immediately after this preparation step, and avoid letting it sit damp at any point, as even a few hours of moisture exposure can cause light surface oxidation before you get to the seasoning stage.
Step 2: Clean and Dry the Pan Thoroughly
This step is where you establish a clean foundation for your seasoning to adhere properly. You are removing any remaining factory oils, dust, and microscopic contaminants that could interfere with the seasoning process. Think of it as preparing a canvas before painting, except here you’re preparing bare metal for its protective coating.
Wash your pan with warm soapy water using a soft sponge or cloth, paying special attention to every surface including the underside and handle. Work gently but thoroughly, and rinse under running water several times until all soap residue is completely gone. The reason this matters is that thorough cleaning removes oils and contaminants that would otherwise prevent your seasoning from bonding properly to the metal. Once rinsed, pat your pan dry with a clean kitchen towel, then use a second dry towel to ensure no moisture remains anywhere on the surface. Don’t rush this part. Take your time getting into the corners, along the rim, and especially around where the handle meets the pan body.
After you have finished drying with towels, place your pan on the stovetop over low heat for about one to two minutes to evaporate any remaining moisture that might be hiding in microscopic crevices. This additional step is crucial because moisture promotes rust and oxidation on carbon steel, particularly before you have built up a protective seasoning layer. You will see any remaining moisture evaporate as a light steam, which tells you the pan is now bone dry and ready for the next phase. Your pan should feel completely dry to the touch with no cool spots that suggest lingering moisture. This preparation ensures your seasoning will bond evenly and create that durable non-stick surface that makes carbon steel so rewarding to cook with.
Professional tip Keep a dedicated kitchen towel exclusively for drying your carbon steel pan after washing, as lint and fabric softener residues from regular laundry can interfere with seasoning buildup and leave microscopic particles on your pan’s surface.
Step 3: Apply and Bake Seasoning Layers
Now comes the transformation. You are about to create a protective coating that will make your pan non-stick and rust-resistant whilst actually improving with every meal you cook. This is where your carbon steel pan truly becomes yours, developing character and performance that only gets better over time.
Start by preheating your oven to 250 degrees Celsius. Whilst the oven warms, select your oil carefully. You want a high smoke point oil like grapeseed, avocado, sunflower, or canola. Avoid olive oil or animal fats as these have lower smoke points and won’t polymerise properly. Pour a small amount of your chosen oil onto a clean cloth or paper towel, then apply an extremely thin coat across the entire pan surface, including the handle, sides, and underside. This is where most people go wrong, they apply too much oil. You are aiming for a barely-there layer that looks almost dry to the eye. Wipe off any excess until the pan appears to have just a gossamer coating. The seasoning process involves heating oil to polymerise it into a hard coating) that bonds to the metal, and this only works when the layer is thin enough. Too much oil creates a sticky, gummy surface instead of a smooth patina.
Here’s a quick reference to suitable oils for seasoning your carbon steel pan:
| Oil Type | Smoke Point (°C) | Suitability for Seasoning | Typical Results |
|---|---|---|---|
| Grapeseed Oil | 215 | Excellent | Hard, smooth patina |
| Sunflower Oil | 232 | Very Good | Even dark finish |
| Avocado Oil | 271 | Outstanding | Durable coating |
| Canola Oil | 204 | Good | Reliable protection |
| Olive Oil | 190 | Not recommended | Sticky, uneven layer |
| Animal Fats | 190-200 | Not recommended | Patchy results |
Once your pan is oiled and your oven has reached temperature, place the pan upside down on the middle oven rack. Put a baking tray on the rack below to catch any oil drips. Bake for 30 minutes, then remove and allow to cool completely before touching it. The heat causes the oil to polymerise, transforming from a liquid into a solid protective layer. You will notice the pan’s surface changes colour slightly as this happens. After it has cooled, you can repeat this process two to three times to build up a strong foundation seasoning. Each layer adds durability and improves non-stick performance. Between layers, simply repeat the oil application and baking steps. After your final bake, allow the pan to cool completely before using it for cooking.
Professional tip Apply your oil in thin circular motions using a cloth, working methodically across every section of the pan, then wipe away approximately 80 percent of what you applied so the surface looks almost dry before baking to avoid sticky buildup.
Step 4: Check the Surface for Proper Patina
You have finished baking your seasoning layers, and now it is time to assess what you have created. A proper patina tells you that your pan is ready for cooking and that you have built a foundation that will only improve with use. This inspection step ensures your seasoning has bonded correctly and provides the protection and performance you need.
Once your pan has cooled completely after the final baking, run your hand gently across the surface. The patina should feel smooth to the touch, not sticky or gummy. Visually, a proper patina appears dark, smooth, and hydrophobic, developing as a thin, polymerised layer that is uniform in colour across the entire cooking surface. Look for a dark brown or black finish that is consistent from edge to edge. You should see no rust spots, peeling areas, or dull grey patches where bare metal is showing through. If you notice any irregular colouration or thin spots, this simply means that particular area did not receive enough oil during application and can be easily fixed. The underside and handle should also show the same uniform darkening as the cooking surface.
Run your finger across the surface and you should feel a slight slickness without any oiliness or tackiness. The pan should not feel sticky at all. If it does feel sticky or gummy, you applied too much oil during seasoning. Do not worry, this is fixable. Simply place the pan back in the oven at 250 degrees Celsius for another 30 minutes to allow the excess oil to further polymerise and harden. If certain areas look lighter or uneven, you can repeat the single layer seasoning process on just those sections. The goal is uniform coverage with a smooth, dark finish. Take a moment to appreciate what you have accomplished. Your carbon steel pan now has a protective layer that resists rust and provides natural non-stick properties. This patina will thicken and improve every time you cook with fatty foods, so it is only going to get better from here.
Compare common seasoning issues and their solutions below:
| Issue | Cause | Visible Sign | Solution |
|---|---|---|---|
| Sticky, gummy surface | Too much oil applied | Sticky texture | Re-bake for 30 minutes |
| Patchy or pale areas | Thin or missing oil spots | Uneven colour | Spot re-season affected zones |
| Rust spots after cleaning | Residual moisture | Orange specks | Remove rust, re-season |
| Dull, grey finish | Insufficient heat or oil | Lack of sheen | Repeat seasoning process |
Professional tip Photograph your pan’s surface after the first seasoning so you have a reference point, then compare future photos to track how your patina develops and darkens over weeks and months of regular cooking.
Step 5: Maintain Your Seasoned Pan After Use
Your pan is now seasoned and ready for cooking, but the work does not stop here. Proper maintenance after each use ensures your seasoning layer grows stronger with every meal you prepare. Think of maintenance as building on the foundation you have created, adding thin layers of protection that will serve you for years to come.
After cooking, allow your pan to cool slightly, then wash it with warm water and a soft sponge or cloth. Use minimal soapy water, just enough to clean away food residue without being aggressive. Avoid harsh detergents and never use abrasive scrubbers or steel wool, as these strip away the seasoning you have worked to build. Rinse thoroughly under running water until all soap is gone. Pat the pan dry with a clean kitchen towel, then place it over low heat on the stovetop for one to two minutes to evaporate any remaining moisture. This step is crucial because maintaining seasoning involves drying thoroughly to prevent rust and preserve the patina you have developed. Once the pan is completely dry, apply a very light coat of your high smoke point oil using a cloth or paper towel, wiping away almost all of it so the surface looks barely oiled. This light oiling after each use strengthens your seasoning layer gradually, creating a naturally non-stick surface that improves over time.
Store your pan in a dry location away from moisture and humidity. Never stack other cookware on top of it without protection, as this can damage the seasoning. With regular use and this simple maintenance routine, your carbon steel pan becomes better with every meal. If you notice food starting to stick more than usual after weeks or months of cooking, this is a signal that your seasoning needs refreshing. This does not mean anything is wrong, it simply means the protective layer has worn down slightly from heavy use or aggressive cleaning, and you can re-season your pan following the baking process to restore its performance. Your pan is designed to last a lifetime with proper care, and this straightforward maintenance keeps it performing beautifully.
Professional tip Store a small bottle of your chosen oil near your cooker so you remember to apply it immediately after washing, making the maintenance ritual quick and automatic rather than an afterthought.
Elevate Your Carbon Steel Cooking Experience Today
Mastering the initial steps to season and maintain your carbon steel pan is essential for achieving that perfect nonstick surface and long-lasting durability. At Brass & Steel, we understand the challenge of building a solid patina without sticky residues or patchy spots. Our single-piece forged pans are designed to respond beautifully to the seasoning process, delivering excellent heat retention and a smooth cooking surface that improves with every meal.
Explore our Carbon Steel Collection to find heirloom-quality pans crafted with precision engineering and thoughtful design. Whether you choose the 27 cm or 30 cm sauté pan, you will receive cookware free from PTFE and PFOA, ready for first-use seasoning that unlocks natural, health-conscious nonstick performance. Visit Brass & Steel now and start building your perfect kitchen companion that lasts a lifetime.
Frequently Asked Questions
How do I prepare my carbon steel pan for its first use?
To prepare your carbon steel pan for its first use, wash it thoroughly with hot soapy water to remove any factory coatings or residues. After washing, dry it completely with a kitchen towel, ensuring no moisture remains, before proceeding to season the pan.
What kind of oil should I use for seasoning my carbon steel pan?
Use a high smoke point oil for seasoning your carbon steel pan, such as grapeseed, avocado, or sunflower oil. Avoid using olive oil or animal fats, as these can create a sticky finish instead of a smooth coating.
How many layers of seasoning should I apply to my carbon steel pan?
For optimal performance, apply two to three thin layers of seasoning to your carbon steel pan. Each layer should involve applying a small amount of oil, cooking the pan in the oven for 30 minutes, and then allowing it to cool completely before the next application.
What if my carbon steel pan feels sticky after seasoning?
If your carbon steel pan feels sticky, this usually means too much oil was applied during seasoning. Place the pan back in the oven at 250 degrees Celsius for 30 minutes to allow excess oil to polymerise and achieve a smooth finish.
How do I maintain my seasoned carbon steel pan after use?
Maintain your seasoned carbon steel pan by washing it gently with warm water and minimal soap, then drying it thoroughly. After drying, apply a very light coat of oil to strengthen the seasoning with each use.
What should I do if I notice rust on my carbon steel pan?
If you notice rust on your carbon steel pan, treat it promptly by removing the rust with a gentle scrub, then re-season the pan. This involves washing, drying, and applying a thin layer of oil followed by baking to restore the protective coating.
Recommended
- Cooking with Carbon Steel Step by Step: Mastering Techniques – Brass & Steel
- Carbon Steel Seasoning Checklist for Lasting Nonstick Performance – Brass & Steel
- Ultimate Carbon Steel Pan Seasoning Guide for Perfect Results – Brass & Steel
- Complete Guide to Everyday Cooking With Carbon Steel – Brass & Steel
- 11 Quick Ideal Protein Recipes to Make at Home. - Home Remedies