
How to Re-Season a Carbon Steel Pan for Perfect Cooking
Seasoning a carbon steel pan sounds like a project for expert chefs, but home cooks everywhere are doing it in their own kitchens. Most people never realize that the key to a long-lasting, natural nonstick surface is using just a whisper of oil—even a teaspoon is enough for an entire pan. What surprises most is that the real secret to success is not the oil or even the oven, but how fanatical you are about getting every single inch bone dry before you even start. That single detail can make or break your results.
Table of Contents
Quick Summary
| Key Point | Explanation |
| 1. Gather essential supplies first | Gather high smoke point oils, towels, mitts, and cleaning tools to ensure a smooth seasoning process. |
| 2. Clean the pan thoroughly before seasoning | Remove any rust or food residue using warm water and a stiff brush, ensuring a smooth surface for seasoning. |
| 3. Dry the pan completely | Wipe down the pan with a lint-free towel and heat it to evaporate moisture, preventing rust formation. |
| 4. Apply a thin layer of oil | Use a small amount of high smoke point oil, ensuring it’s evenly applied without pooling or excess. |
| 5. Heat to set the seasoning | Preheat your oven and heat the oiled pan upside down for one hour, allowing the oil to polymerize for tough seasoning. |
Step 1: Gather Your Supplies and Tools
Re-seasoning a carbon steel pan requires precision and the right equipment. Before diving into the process, gathering all necessary supplies ensures a smooth, efficient restoration of your cookware’s protective layer. The key is preparation and understanding what tools will help you create a durable, natural nonstick surface.
Your essential toolkit for re-seasoning a carbon steel pan should include specific items that facilitate cleaning, protecting, and conditioning the pan’s surface. High smoke point oils are critical for successful seasoning, with options like grapeseed, avocado, or sunflower oil providing the best results. Avoid olive oil or animal fats, which can create uneven seasoning and potentially rancid coatings.
Choose cooking implements that allow you to apply oil evenly and handle the pan safely. A lint-free kitchen towel or paper towels work perfectly for wiping excess oil, ensuring a thin, even layer that promotes proper seasoning. Thick, padded oven mitts protect your hands when handling the hot pan during the seasoning process. A metal scraper or steel wool can help remove any existing damaged seasoning, preparing the pan’s surface for renewal.
Preparation also involves selecting the right workspace. You will need access to hot water, mild dish soap, and a clean, dry area near your oven. Protect your countertops with a heat-resistant surface or baking sheet to catch any potential oil drips. Having aluminum foil or a large baking sheet ready helps catch excess oil and makes cleanup easier.
By meticulously gathering these supplies beforehand, you set yourself up for a successful carbon steel pan re-seasoning experience.
Here is a handy table summarizing all the essential supplies for re-seasoning a carbon steel pan, including their purpose and any important notes.
| Item | Purpose | Notes |
| High smoke point oil | Creates durable seasoning layer | Recommended: grapeseed, avocado, sunflower |
| Lint-free towels/paper towels | Wipe excess oil and dry pan thoroughly | Avoid lint residue |
| Thick oven mitts | Protect hands when handling hot pan | Use during oven and heating steps |
| Metal scraper/steel wool | Remove damaged seasoning, rust, residue | Use gently to avoid scratching |
| Mild dish soap | Support deep cleaning | Use sparingly, avoid prolonged soaking |
| Aluminum foil/baking sheet | Catch excess oil during seasoning | Place under pan in oven |
| Clean dry workspace | Safe, organized area for prepping and handling | Set up near oven for efficiency |
Essential Supplies Checklist:
-
High smoke point oil (grapeseed, avocado, sunflower)
-
Lint-free kitchen towels or paper towels
-
Thick oven mitts
-
Metal scraper or steel wool
-
Mild dish soap
-
Aluminum foil or baking sheet
-
Clean, dry workspace near oven
Step 2: Clean the Pan Thoroughly
Cleaning your carbon steel pan thoroughly is a critical step in the re-seasoning process that prepares the surface for a fresh, protective layer. Unlike other cookware, carbon steel requires a specific approach that removes old seasoning, rust, or food residue without damaging its underlying metal structure. Your goal is to create a clean, smooth surface that will readily accept the new seasoning.
Begin by inspecting the pan for any visible rust, sticky residue, or uneven seasoning. Warm water and a stiff brush or steel wool become your primary tools for this initial cleaning phase. Gently scrub the entire surface, including the sides and bottom, using circular motions that help remove any loose particles. If the pan has significant rust or stubborn residue, a mild dish soap can be used sparingly. However, avoid prolonged soaking, as carbon steel is susceptible to rapid rusting.
For more challenging cleaning scenarios, you might need to employ a metal scraper to carefully remove any deeply embedded residue. Work methodically, applying gentle pressure to avoid scratching the pan’s surface. After scrubbing, rinse the pan thoroughly with warm water, ensuring all soap and debris are completely removed. Immediately dry the pan using a clean, lint-free towel, paying special attention to removing all moisture. To guarantee complete dryness, place the pan on a stovetop burner for a few minutes, allowing any remaining water to evaporate.
Verify the pan’s readiness by checking its surface. It should appear clean, with a uniform color and no visible rust or old seasoning. The metal should feel smooth to the touch, indicating you’ve successfully prepared it for the next seasoning stage. Learn more about carbon steel pan maintenance to ensure long-lasting performance.
Potential Cleaning Challenges:
-
Stubborn rust patches
-
Sticky residue from previous seasoning
-
Uneven surface texture
Remember, patience and gentle technique are key to preparing your carbon steel pan for a perfect new seasoning layer.
This table provides quick troubleshooting help for common challenges you may encounter when cleaning, drying, oiling, or heating your carbon steel pan.
| Problem | Possible Cause | Solution |
| Stubborn rust patches | Incomplete cleaning or drying | Use steel wool or metal scraper; ensure thorough drying |
| Sticky residue after seasoning | Too much oil applied | Wipe excess oil; apply thinner layer next time |
| Uneven surface or color | Uneven oil distribution or heating | Spread oil uniformly; ensure consistent oven temperature |
| Pan rusts quickly after cleaning | Residual moisture left on pan | Dry completely with towel and stovetop heat |
| Seasoning flakes or peels | Old seasoning not fully removed | Scrub pan completely before re-seasoning |
| Smoke during oven step | Normal with high-heat polymerization | Ensure good ventilation; minor smoke is expected |
| Egg or food sticking | Incomplete/uneven seasoning | Repeat seasoning steps to build layer |
Step 3: Dry the Pan Completely
Drying your carbon steel pan is more than a simple post-cleaning routine—it’s a critical defense against rust and a fundamental preparation step for successful re-seasoning. Moisture is the sworn enemy of carbon steel, capable of triggering rapid oxidation that can compromise your cookware’s integrity and performance. Your goal in this step is to remove every trace of water using precise, strategic techniques.
Immediate and thorough drying begins the moment you finish cleaning. Use a clean, lint-free kitchen towel or paper towel to wipe down the entire pan surface, paying special attention to corners, handle, and any textured areas where water might collect. Press the towel firmly, absorbing moisture completely. Do not leave any damp spots, as even a small amount of water can initiate rust formation within minutes.
To guarantee absolute dryness, leverage heat as your final moisture-removal technique. Place the pan on a stovetop burner set to low or medium heat, allowing residual moisture to evaporate quickly. Watch the pan’s surface carefully—it will transform from a dull, slightly wet appearance to a uniform, dry metallic sheen. This process typically takes 2-3 minutes and ensures that microscopic water droplets disappear completely. The pan should feel warm to the touch and look uniformly dry with no water beads or moisture traces.
Your verification checklist involves a simple visual and tactile inspection. The pan should appear completely dry, with a consistent color and no water droplets. When you touch the surface, it should feel smooth and entirely dry, without any cool or damp sensations. Check out our comprehensive guide on carbon steel pan care for additional maintenance insights.
Potential Drying Challenges:
-
Persistent moisture in pan crevices
-
Incomplete drying leading to potential rust
-
Uneven heat distribution during drying
Remember, thorough drying is your first line of defense in maintaining your carbon steel pan’s longevity and performance.
Step 4: Apply a Thin Layer of Oil
Applying a thin, even layer of oil is the transformative moment in re-seasoning your carbon steel pan. This step creates the protective polymerized coating that gives your cookware its distinctive nonstick properties and rust resistance. The key is understanding that more oil is not better—you want an almost imperceptibly thin layer that will bond with the metal’s surface.
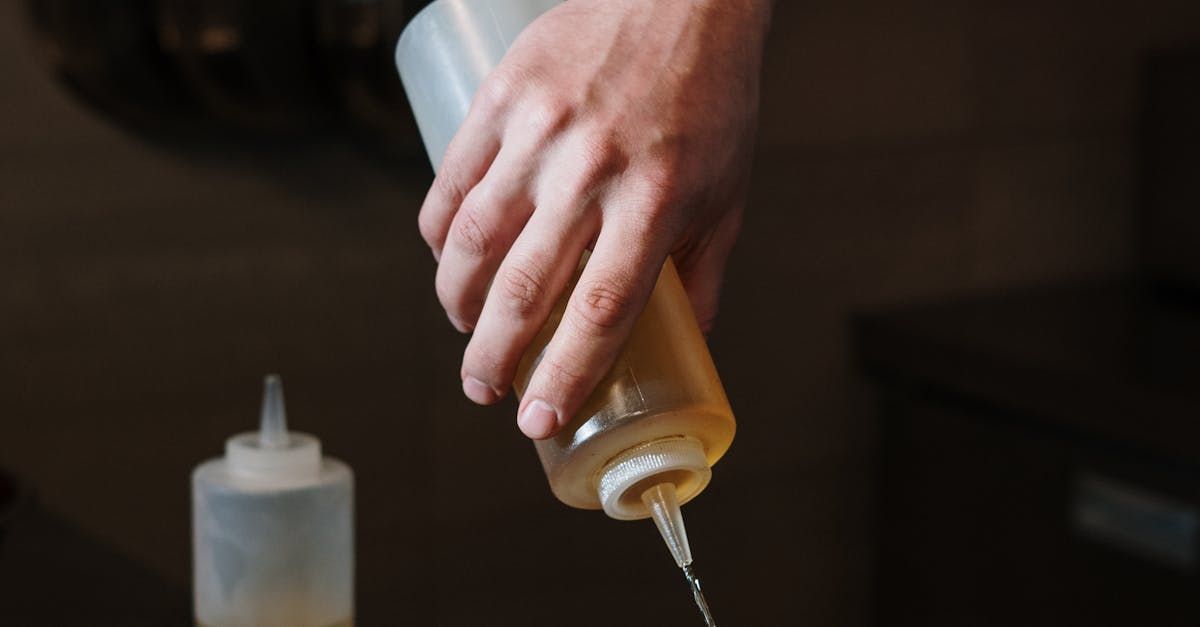
Select a high smoke point oil like grapeseed, avocado, or sunflower oil. These oils polymerize effectively at high temperatures, creating a durable seasoning layer. Take a clean, lint-free paper towel or soft cloth and pour a small amount of oil—no more than a teaspoon for a standard pan. Begin at the center of the pan and work the oil outward in circular motions, ensuring complete coverage of the interior surface, sides, and exterior. The goal is a layer so thin that the pan appears almost dry, with no pooling or visible oil droplets.
Pay special attention to technique during application. Use firm, consistent pressure to spread the oil, rotating the pan to achieve uniform coverage. Every square inch should have a microscopic oil film, but the surface should not appear wet or shiny. Excess oil will create a sticky, uneven seasoning that attracts dust and prevents proper polymerization. If you notice any pooling, use a clean section of your towel to wipe away the surplus, leaving only the most minimal protective coating.
Verify your oil application by holding the pan at different angles under good lighting. The surface should have a uniform, slightly matte appearance with no glossy spots or oil accumulation. Explore our expert techniques for maintaining carbon steel cookware to perfect your seasoning skills.
Common Oil Application Challenges:
-
Uneven oil distribution
-
Applying too much oil
-
Not covering entire pan surface
Remember, a successful seasoning is about precision, patience, and a light touch.
Step 5: Heat the Pan to Set the Seasoning
Heating your carbon steel pan is the alchemical process where thin oil transforms into a protective, naturally nonstick surface. This step triggers polymerization—a chemical reaction where oil molecules bond with the metal, creating a durable seasoning layer that protects against rust and provides exceptional cooking performance. Precision is critical during this transformation, as temperature and duration directly impact the quality of your pan’s seasoning.
Prepare your oven by preheating it to 450-500 degrees Fahrenheit, ensuring even and consistent heat distribution. Place a large baking sheet on the lower rack to catch any potential oil drips, protecting your oven from mess. Position the oiled pan upside down on the middle rack, which allows excess oil to drip away and ensures complete, uniform heating. The inverted position prevents oil pooling and promotes an even, thin seasoning layer across the entire pan surface.
During heating, you might notice a slight smoking—this is normal and indicates the oil is polymerizing. Maintain the pan in the oven for approximately one hour, which provides sufficient time for the oil to break down and bond with the metal’s surface. Resist the temptation to open the oven frequently, as consistent heat is crucial for creating a smooth, durable seasoning.
After the hour passes, turn off the oven but leave the pan inside, allowing it to cool gradually. This slow cooling process helps solidify the seasoning layer and prevents potential warping.
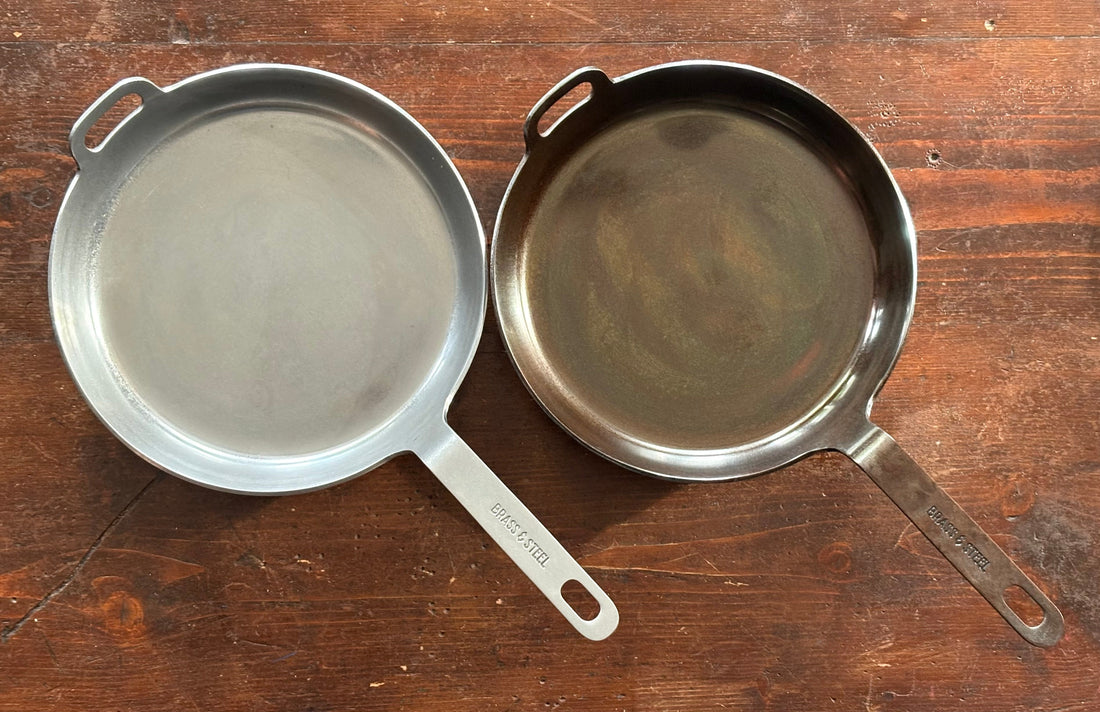
Verify the seasoning’s success by examining the pan’s surface. It should appear dark, uniformly colored, and have a smooth, slightly sheen appearance without any sticky or uneven patches. Discover more about maintaining your carbon steel cookware to ensure long-lasting performance.
Potential Heating Challenges:
-
Inconsistent oven temperature
-
Uneven oil distribution
-
Inadequate heating duration
Remember, patience and attention to detail will reward you with a perfectly seasoned carbon steel pan.
Step 6: Verify the Seasoning is Effective
Verifying the effectiveness of your carbon steel pan’s seasoning is a critical final step that determines whether your hard work has produced the desired protective layer.
Begin your verification by conducting a visual inspection under good lighting. The pan’s surface should display a uniform, dark color ranging from deep brown to near-black, without any patchy or inconsistent areas. Run your fingertips gently across the surface—it should feel smooth and slightly slick, with no sticky residue or rough patches. The seasoning layer must appear integrated with the metal, not like a separate coating that might peel or flake. Pay close attention to edges and corners, ensuring complete coverage and consistent coloration throughout the entire pan.
Practical testing provides the most definitive proof of successful seasoning. Prepare a simple egg test by heating the pan with a small amount of oil and cracking an egg into it. A well-seasoned pan will allow the egg to slide effortlessly without sticking, demonstrating the nonstick properties you’ve worked to achieve. Additionally, observe how water beads on the surface—it should roll smoothly across the pan rather than immediately absorbing or causing rust. Cooking a few fatty foods like bacon or searing meat can further strengthen and verify the seasoning, as these foods help continue the polymerization process. Explore our comprehensive guide to carbon steel pan maintenance for ongoing care tips.
Verification Indicators:
-
Uniform dark color across entire surface
-
Smooth, non-sticky texture
-
Egg slides easily without sticking
-
Water beads and rolls across pan
-
No visible rust or uneven patches
Remember, seasoning is an ongoing process that improves with each cooking session.
Transform Your Cooking With Perfectly Seasoned Carbon Steel
Struggling with uneven seasoning, sticky residues, or dull performance in your carbon steel pan? You are not alone. Many cooks find it frustrating when their cookware loses its natural nonstick surface or starts to rust despite their best efforts. The right re-seasoning technique can revive your pan and restore confidence in the kitchen. At Brass & Steel, we build on everything you learned in the article, offering single-piece carbon steel pans engineered for superior heat distribution and effortless care. Explore our Carbon Steel Collection to discover cookware that matches your ambition for perfect cooking results.

Ready to level up your meals and enjoy a naturally nonstick experience? Choose heirloom-quality pans that stay easy to season and maintain their beauty. Visit https://brass-steel.com for our full lineup or dive deeper with our expert care and seasoning guides. Make the switch today so every meal starts with confidence and ends with delicious results.
Frequently Asked Questions
How often should I re-season my carbon steel pan?
Re-season your carbon steel pan when it shows signs of wear, such as rust, dullness, or food sticking. Regular maintenance and light seasoning after heavy use can extend its life.
What oil is best for seasoning a carbon steel pan?
High smoke point oils, such as grapeseed, avocado, or sunflower oil, are ideal for seasoning. Avoid using olive oil or animal fats, as they may lead to uneven seasoning and rancidity.
Can I use soap when cleaning my carbon steel pan before re-seasoning?
Yes, you can use mild dish soap sparingly during the cleaning process to remove stubborn residue or rust. However, avoid prolonged soaking to prevent moisture damage.
How can I tell if my seasoning is successful?
A successful seasoning will give your pan a dark, smooth surface that feels slightly slick without sticky spots. Conduct a simple egg test; if the egg slides easily without sticking, your seasoning is effective.