

How to dry carbon steel pans for rust-free cooking
TL;DR:
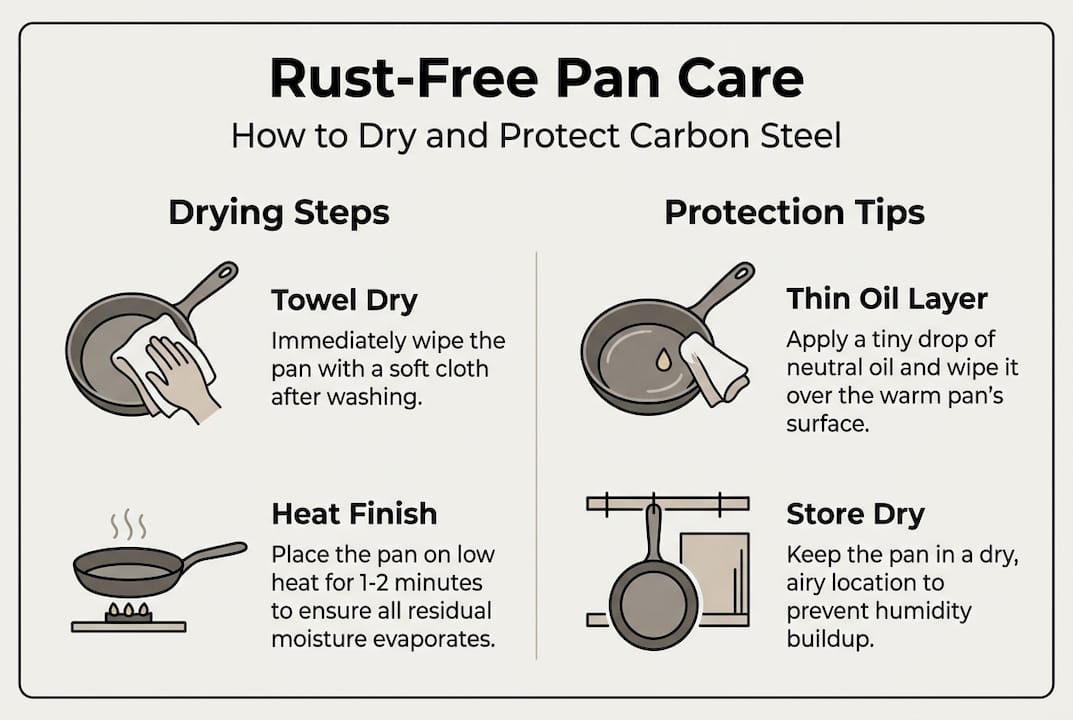
- Proper drying involves towel or paper towel wiping followed by stovetop heat to prevent rust.
- Storing pans in well-ventilated, uncovered positions avoids moisture buildup and rust formation.
- Consistent drying and oiling develop a natural nonstick patina, extending pan lifespan.
You wash your carbon steel pan, leave it on the draining board, and by morning there’s a faint orange blush across the surface. It’s one of the most disheartening sights in the kitchen, yet it’s entirely avoidable. Carbon steel is beloved for its heat performance and natural nonstick potential, but it demands one thing above all else: complete dryness after every wash. This guide walks you through the exact steps to dry, oil, and store your pan so rust never gets a foothold. From towel technique to stovetop finishing and smart storage, every detail is covered.
Table of Contents
- What you need to dry carbon steel pans properly
- Step-by-step: The best way to dry your carbon steel pan
- Oiling and finishing for long-term protection
- Essential storage tips for dry, rust-free pans
- Dealing with rust: Quick fixes and full restoration
- Why careful drying transforms your carbon steel pan
- Get the best from your pan with quality tools
- Frequently asked questions
Key Takeaways
| Point | Details |
|---|---|
| Towel then heat-dry | Always dry your pan with a towel then heat it on the hob to prevent rust. |
| Thin oil layer for protection | Apply a light coating of high smoke-point oil after drying to maintain the seasoning and guard against rust. |
| Store uncovered for airflow | Store pans in the open or hanging to encourage air circulation and avoid moisture buildup. |
| Tackle rust immediately | Address any rust promptly with salt and vinegar scrubs and re-oiling to prevent permanent damage. |
What you need to dry carbon steel pans properly
Before touching your pan after washing, gather the right tools. Using the wrong materials, or skipping a step, is where most rust problems begin. The good news is that everything you need is already in your kitchen.
Here is what you will need:
- A clean, dry soft cloth or paper towels. Lint-free cloths work best. Paper towels are a reliable backup because they leave no residue and absorb moisture efficiently.
- Your hob or stovetop. Any heat source works, including induction.
- A neutral, high smoke-point oil. Grapeseed, canola, or sunflower oil are ideal. Keep a small bottle near your pan so the habit stays effortless.
- A clean paper towel for oiling. A separate one from your drying towel prevents cross-contamination.
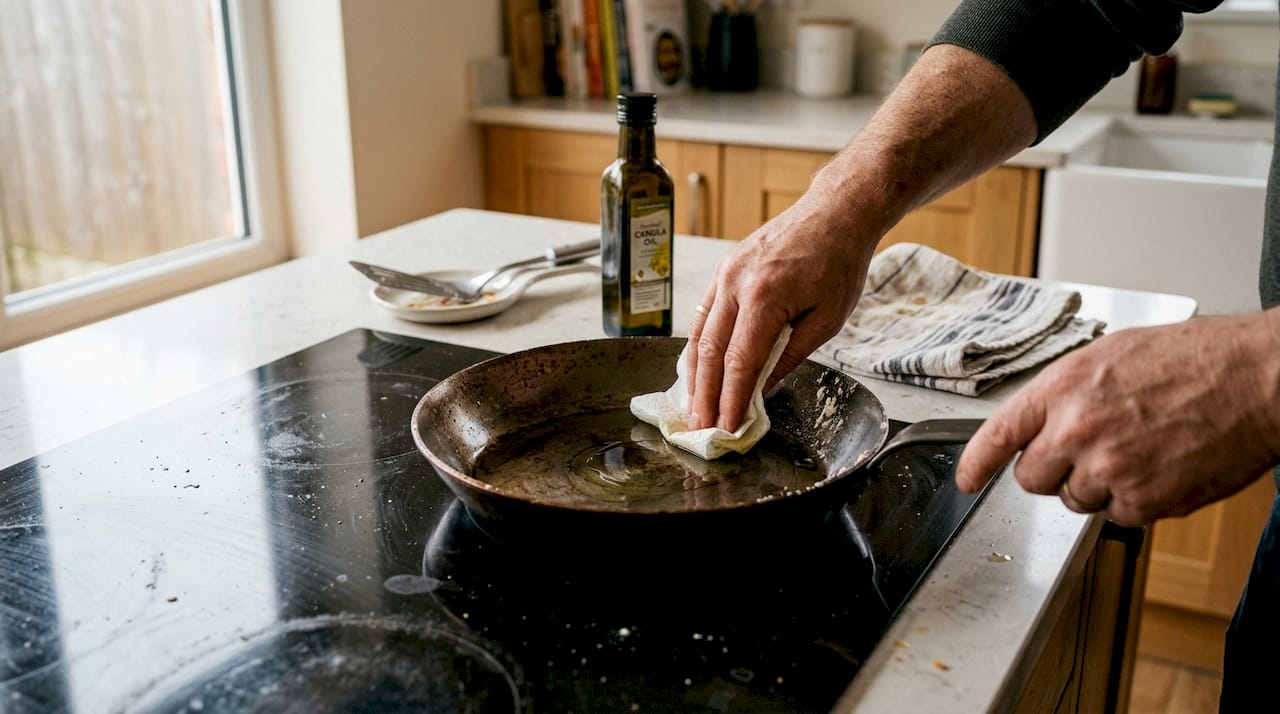
As part of preventing pan rust, the single most important principle is speed. Wipe thoroughly dry with a clean towel or paper towel immediately after washing to remove all moisture and prevent rust formation. Every minute the pan sits wet, oxidation begins.
| Method | Effectiveness | Risk level | Time needed |
|---|---|---|---|
| Soft towel only | Moderate | Medium (misses crevices) | 1 minute |
| Air-drying rack | Low | High (moisture lingers) | 20+ minutes |
| Towel + stovetop heat | High | Very low | 5 minutes |
| Paper towel + stovetop | High | Very low | 5 minutes |
The care guide from Made In confirms that air-drying alone is never sufficient for carbon steel. The table above makes the case plainly: combining a towel with stovetop heat is the only method that reliably eliminates all moisture.
Do:
- Use a fresh, clean towel every time.
- Store your oil within arm’s reach of the hob.
- Check the handle joint and rim carefully.
Don’t:
- Leave the pan to drip-dry.
- Use a damp or previously used cloth.
- Rush the stovetop step.
Step-by-step: The best way to dry your carbon steel pan
With your materials ready, let’s move to the actual drying process, step by step, with no skipped details. This routine takes under ten minutes and becomes second nature within a week.
- Wash the pan with warm water. Avoid soaking. A brief rinse with a soft brush removes food residue without stripping seasoning.
- Wipe dry immediately using a clean towel or paper towel. Work across the entire surface, including the sides and the handle joint.
- Heat dry on the stovetop on low heat. Place the pan on low heat for 3 to 5 minutes to evaporate any remaining water, ensuring it is bone-dry, especially in crevices.
- Visual and tactile check. Tilt the pan under good light. No water beads, no damp patches, no steam rising from the surface.
Thorough drying via towel combined with stovetop heat is the mechanical key to rust prevention. One step alone is rarely enough.
Pro Tip: Watch for the pan to shift from a slightly darker, damp-looking grey to a uniform, lighter tone as moisture evaporates. That colour change tells you the pan is bone-dry and ready for the next step.
For more pan upkeep tips, including how to handle stubborn food residue without damaging your seasoning, our full guide covers every scenario. The stovetop step is non-negotiable because crevices, especially around the base of the handle on single-piece pans, trap water that a towel simply cannot reach.
Oiling and finishing for long-term protection
Once dry, protecting your pan calls for just one more step: proper oiling and heat finishing. This is where many home cooks either over-oil (creating a sticky surface) or skip the step entirely (leaving the pan unprotected). Neither is ideal.
Oiling after drying does three things at once. It seals the steel surface against ambient moisture. It builds up the patina layer that eventually becomes your natural nonstick surface. And it prevents the micro-oxidation that occurs even in dry air over time.
Apply a very thin layer of high smoke-point oil using a paper towel, wiping until the pan looks dry and shiny but not greasy. This protects against rust and builds seasoning with every single use.
| Oil type | Smoke point | Cost (Europe) | Notes |
|---|---|---|---|
| Grapeseed | 216°C | Moderate | Neutral flavour, ideal finish |
| Canola | 204°C | Low | Widely available, excellent choice |
| Sunflower | 227°C | Low | Common in European kitchens |
| Avocado | 271°C | High | Premium option, very stable |
| Olive oil | 190°C | Low | Avoid for seasoning |
Common oiling mistakes to avoid:
- Using too much oil. A sticky surface is the result. Less is genuinely more here.
- Skipping the heat step. Warming the oiled pan briefly helps the oil bond to the steel rather than sitting on top.
- Reaching for olive oil. Its low smoke point and strong flavour compounds interfere with proper pan maintenance steps.
Pro Tip: After wiping the oil on, wipe it almost entirely off again with a fresh paper towel. The pan should look shiny but feel dry to the touch. If it feels greasy, you’ve used too much.
Essential storage tips for dry, rust-free pans
After drying and oiling, where and how you store your pan makes all the difference. In many European homes, kitchens are compact and storage options are limited. But a few simple habits protect your pan between uses.
Air circulation is the critical factor. When a pan is stored in an enclosed space without airflow, condensation can form on the steel surface, especially in coastal or northern European climates where humidity is higher. In humid European climates, extra vigilance against moisture is needed. Store pans uncovered or hung to promote air circulation and avoid stacking while damp.
The best storage options, ranked:
- Hanging on a wall hook or rail. Maximum airflow, zero contact with other surfaces.
- Open pan rack. Good airflow, easy access.
- Stacked with a dry cloth between pans. Acceptable only when pans are fully dry.
Places to never store your carbon steel pan:
- Inside enclosed drawers with no ventilation.
- Covered with a damp cloth or lid that traps moisture.
- In a cold garage or utility room where temperature fluctuations cause condensation.
- Directly on a damp surface.
For detailed advice on how to store pans in smaller European kitchens, including wall-mounting ideas and rack recommendations, our storage guide has practical solutions for every layout. Always do a final visual and tactile check before putting the pan away. Run your hand across the cooking surface. If there is any coolness or dampness, return it to the hob for another two minutes.
Dealing with rust: Quick fixes and full restoration
Of course, even with best habits, a spot of rust may appear. It does not mean your pan is ruined. Carbon steel is remarkably forgiving, and most rust issues are solved in under twenty minutes.
Minor rust (surface spots):
- Sprinkle coarse salt generously over the affected area.
- Add a small splash of white vinegar and scrub with a stiff brush or steel wool.
- Rinse thoroughly with warm water.
- Dry immediately using the towel-plus-stovetop method described above.
- Apply a thin coat of oil and heat briefly to bond it to the steel.
Major rust (widespread or deep):
- Strip the pan fully using steel wool and a salt-vinegar paste across the entire surface.
- Rinse, then dry completely on the stovetop.
- Re-season from scratch following a full removing rust from pans protocol, repeating the oven-seasoning process two to three times.
Minor rust spots can be scrubbed with salt and vinegar, dried thoroughly, and re-oiled. Heavy rust requires stripping and re-seasoning, but the pan is never beyond saving.
Pro Tip: Most rust starts in hidden areas. Pay close attention to the handle joint and the rim of the pan when drying and oiling. These spots are easy to miss and are the first places moisture collects.
For ongoing habits that keep rust away entirely, our guide on prevent rust cookware steps covers the full picture from washing to long-term storage.
Why careful drying transforms your carbon steel pan
There is a perspective worth sharing here, one that goes beyond the practical checklist. Most home cooks treat drying as a chore to get through. Professional kitchen teams treat it as a ritual, and that distinction matters enormously over time.
Restaurant chefs who use carbon steel pans daily will tell you that the pans they treasure most are not the newest ones. They are the ones that have been dried and oiled after every single service for years. The payoff is a dark patina that develops within roughly one year of consistent care, becoming naturally nonstick in a way no coating can replicate. Inconsistent drying leads to surface spots that are easy to fix early but become a full restoration project if ignored for months.
At Brass & Steel, we see this regularly. A pan that has been dried and oiled consistently after every use for a year cooks differently from one that has been neglected. The surface is darker, smoother, and genuinely less sticky. Small slip-ups are always fixable. But regular negligence compounds, and what starts as a damp patch becomes a rust patch, then a seasoning failure. The five minutes you spend drying and oiling your pan is the most valuable cooking investment you make. For a deeper look at restaurant pan care experience and what it teaches home cooks, the lessons translate directly to your kitchen.
Get the best from your pan with quality tools
If you’re ready to elevate your cookware game, trusted gear makes a difference from the start. The routines in this guide are only as effective as the pan you’re working with.
At Brass & Steel, our professional carbon steel pans are forged from a single piece of steel with no rivets or welds, which means fewer crevices for moisture to hide in and a surface that seasons beautifully with every use. Our 27 cm and 30 cm sauté pans are designed to make daily care simple and rewarding. Explore our full range, care guides, and our dedicated rust care guide to keep your pan performing at its best for years to come.
Frequently asked questions
Can you air-dry a carbon steel pan safely?
Air-drying is not recommended, as it leaves moisture on the surface and can lead to rust, especially in humid climates. Bone-dry via heat drying prevents the vast majority of rust issues that home cooks encounter.
How do you know when a carbon steel pan is dry enough?
The pan should feel completely dry to the touch with no water beads visible anywhere on the surface. Warming on the stovetop for 3 to 5 minutes until it appears bone-dry is the most reliable method.
What kind of oil is best for finishing a dry carbon steel pan?
High smoke-point oils such as grapeseed, canola, and sunflower are ideal for protecting and seasoning carbon steel pans. A very thin layer wiped until the pan looks dry protects against rust and builds seasoning simultaneously.
If my pan develops rust, do I need to throw it away?
No. Minor rust spots can be scrubbed away with salt and vinegar, then the pan dried and re-oiled. Even heavy rust can be treated and the pan fully re-seasoned for continued use.
Does drying a pan on the stove work for all carbon steel pans?
Yes, stovetop drying works for any carbon steel pan and is especially effective for reaching hard-to-dry crevices. Low heat for 3 to 5 minutes evaporates moisture that towel-drying alone cannot remove.