
Mastering the Perfect Sear with a Carbon Steel Pan for Steak, Chicken or Fish
Share
Achieving a perfect sear on meats like steak, chicken, and fish is a hallmark of advanced cooking skill. The secret to that golden-brown crust and succulent interior isn’t just technique – it’s also having the right pan for the job. A carbon steel pan (often in the form of a carbon steel skillet) is revered among chefs and seasoned home cooks as one of the best pans for steak and equally capable for poultry and seafood. In this comprehensive guide, we’ll explore professional-level searing techniques for each protein and explain why a high-quality carbon steel skillet – such as the ones from Brass & Steel – can elevate your searing game. Let’s dive into the science and steps of searing to get you cooking restaurant-quality meals at home.
Why Choose a Carbon Steel Pan for Searing?
Carbon steel pans have surged in popularity for good reason. They combine many of the best attributes of cast iron and stainless steel into one versatile piece of cookware. Here’s why a carbon steel skillet is ideal for high-heat searing:
High Heat Tolerance and Retention: Carbon steel can be heated to very high temperatures needed for an intense sear. It holds heat effectively to maintain a steady, hot searing surface. This means when you lay a cold steak or chicken thigh on the pan, the temperature won’t drop as drastically, allowing for a deep brown crust to form without overcooking. Brass & Steel’s pans are designed for high-heat cooking – forged from thick single-piece steel that resists warping and handles years of searing abuse.
Fast and Responsive Heating: Unlike hefty cast iron, carbon steel heats up quickly and also cools down faster when you adjust the burner. This responsiveness gives you more control. Need to dial back the heat to prevent burning the crust? A carbon steel pan reacts in seconds. Yet it still offers enough heat retention to get that satisfying Maillard browning on your foods.
Slick Seasoned Surface: Like cast iron, carbon steel develops a natural non-stick seasoning layer with use. Once properly seasoned, the pan’s surface becomes quite slick, so foods release easily without tearing. This is especially helpful for delicate items like fish skin. In fact, experts note that a well-seasoned carbon steel skillet is one of the top choices for achieving crispy fish skin without sticking.
Lighter Weight & Maneuverability: Carbon steel pans are thinner and lighter than cast iron, making them easier to handle. The lighter weight makes tasks like flipping a big ribeye steak or tilting the pan to baste with butter much less cumbersome. You can shake, tilt, and toss ingredients with confidence – a boon for advanced techniques.
Stovetop-to-Oven Versatility: Quality carbon steel pans are oven-safe (no plastic parts or coatings) and work on any cooktop, including induction. This means you can sear on the stovetop and finish cooking in the oven without switching pans. Searing a thick steak or bone-in chicken piece and then roasting it through in the same pan is seamless with carbon steel. Brass & Steel’s carbon steel skillet, for example, has an all-metal construction (with no rivets or welds) built to endure high oven temps and even broilers.
Durability for the Long Haul: A carbon steel pan is a lifetime investment. With no chemical coatings to scratch or flake, you don’t have to baby it. Over years of use, it actually gets better as the seasoning develops. Brass & Steel’s pans are made from pure, heavy-gauge carbon steel with one-piece forging, meaning there are no weak points – these skillets are built to last for generations of serious cooking.
In short, carbon steel offers precision, performance, and longevity – all essential for mastering high-heat searing at home. Now, let’s get into the nitty-gritty of technique. First, we’ll cover some universal preparation steps for a great sear, then we’ll tackle each type of protein (steak, chicken, fish) in detail.
General Preparation for the Perfect Sear
No matter what you’re searing, a few key preparation steps will set you up for success. Think of these as the mise-en-place for searing excellence:
Start with a Seasoned Pan: Make sure your carbon steel pan is clean and has a good seasoning layer. If it’s brand new (Brass & Steel pans ship unseasoned, coated with beeswax), follow the seasoning instructions first. A seasoned pan not only enhances flavor but also provides a semi-nonstick surface. This is crucial for foods like fish, which are prone to sticking – even a well-seasoned carbon steel pan or cast iron yields the best results for crispy, non-stuck fish skin. (Tip: If your pan’s seasoning is still building, you can do a quick stovetop seasoning by heating a thin film of oil to smoking and wiping it out a few times.)
Bring Meat to Room Temperature (Tempering): While not absolutely required, many experts recommend letting steak or thick cuts of meat sit out for 30 minutes or so to remove the chill before cooking. A tempered piece of meat will cook more evenly. For chicken, this step can also prevent the skin from contracting too quickly when it hits the heat, which can help keep it from sticking. Advanced tip: For steaks, consider dry brining – salting the meat at least 40 minutes up to overnight in the fridge. This not only seasons the interior but also dries the surface for superior browning.
Pat Everything Very Dry: Moisture is the enemy of a good sear. Use paper towels to thoroughly pat dry your steaks, chicken pieces, and fish fillets. This is especially critical for poultry skin and fish skin. In fact, chefs sometimes even scrape a fish skin with a knife to remove every bit of moisture before cooking. Less surface water means you’ll get browning right away instead of steaming the food in its own juices. A dry surface is what allows the Maillard reaction to begin almost instantly, creating that browned crust.
Season Simply (but Sufficiently): Just before searing, season your protein. A generous sprinkle of salt (and pepper, except on very delicate fish skin or if pepper might burn) is usually all you need right before cooking. If you salted well in advance (dry brine), there’s no need to salt again; just maybe add pepper. Avoid wet marinades right before searing – liquid on the surface will inhibit crust formation. You can always marinate earlier, then pat dry. Many pro cooks also oil the meat rather than the pan for steaks, lightly rubbing the steak with high-temp oil, which ensures even coverage.
Preheat the Pan Thoroughly: Place your carbon steel pan on the stove and heat it up before adding any food. Generally, use medium-high to high heat for searing. Let the pan heat dry for a couple of minutes until it’s very hot. You can test by flicking a few drops of water in – they should skitter and evaporate immediately (the “dancing” water test). With carbon steel on an induction or powerful burner, medium heat might suffice, as these pans get hot fast. If using gas or electric, medium-high is usually right for a serious sear. The goal is a hot surface so that when the food hits, it sizzles vigorously. Note: Brass & Steel’s thick-gauge pan heats evenly, so give it a moment to fully preheat for uniform heat across the surface.
Use a High Smoke-Point Cooking Fat: Once the pan is hot, add a thin layer of oil (or fat) to just coat the surface. Choose an oil with a high smoke point since searing = high heat. Great options are vegetable oil, canola, grapeseed, avocado oil, or clarified butter (ghee). Avoid whole butter at the start – it will burn from the milk solids (though adding butter later for flavor is fine). Heat the oil until it shimmers. You might even see the first wisps of smoke – that’s your signal the pan is ready for the meat. At this point, everything should be prepped and within arm’s reach because once you start searing, things move quickly.
With these preliminaries done, you’re ready to sear. Let’s break down techniques for each type of protein:
Searing the Perfect Steak in a Carbon Steel Skillet
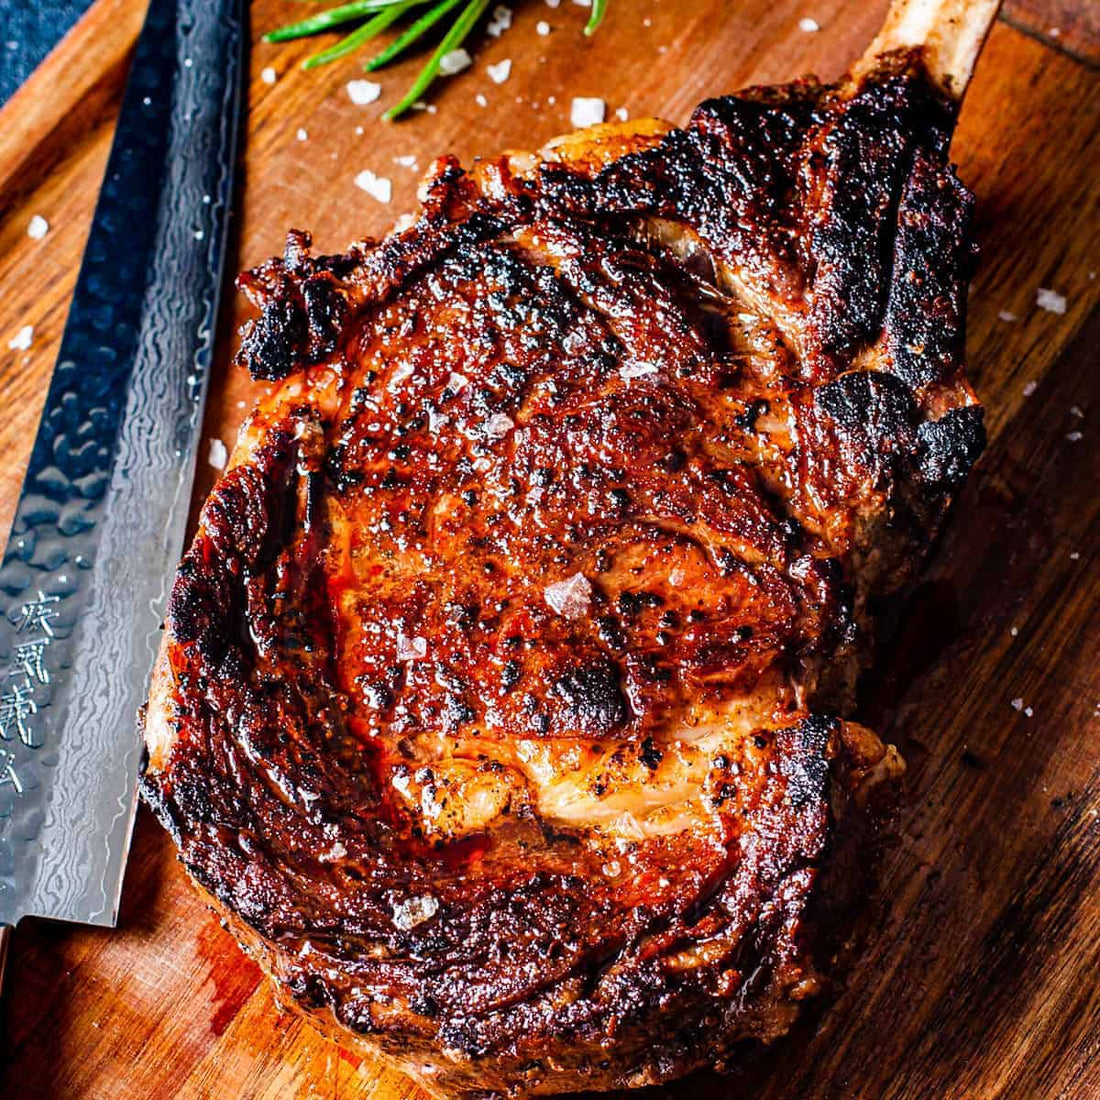
There’s nothing quite like a perfectly seared steak: dark, crusty exterior and tender, juicy center. A carbon steel skillet is often hailed as the best pan for steak because it can deliver steakhouse results at home. Here’s how advanced cooks get that coveted crust:
Choose the Right Cut and Thickness: Start with a good-quality steak, about 1 to 1.5 inches thick for ideal searing (thinner cuts tend to overcook by the time a crust forms, whereas very thick cuts might need an oven finish). Ribeyes, strip steaks, filet mignon, or sirloin all sear well. If there’s excess surface moisture (say, a thawed steak), pat it absolutely dry.
Season in Advance: As mentioned, salting the steak ahead of time (at least 40 minutes, or even overnight in the fridge) can significantly improve browning by drawing out moisture then reabsorbing, drying the surface. An air-dried steak will develop a stunning crust. If you didn’t plan ahead, no worries – just salt and pepper right before it hits the pan.
Sear on a Screaming Hot Pan: Place the steak in the preheated, oiled carbon steel pan. It should sizzle aggressively on contact. For a traditional approach, leave the steak undisturbed on the first side for about 2–3 minutes (for a 1-inch steak) or until a brown crust forms. Avoid the temptation to move it too soon; the meat will initially stick but then naturally release when a crust has developed. As long as the pan was properly heated and oiled, it will release without tearing once browned.
Flip and Sear the Other Side: Once the first side is nicely seared, flip the steak. (Use tongs or a spatula; avoid forks that puncture and release juices.) Sear the second side for another 2–3 minutes. For edge fat (like on a strip steak or ribeye cap), hold the steak upright with tongs and press the fatty edge against the pan for 30–60 seconds to render and brown it. This gives you a lovely crispy edge and renders out excess fat.
Advanced Flipping Technique: You might have heard the rule “only flip once,” but advanced cooks know this is a myth. In fact, flipping a steak multiple times (every 30 seconds or so) can cook it more evenly and faster without sacrificing crust. Frequent flipping allows the interior to heat uniformly and can shorten the cooking time by up to 30%. The key is to have that dry surface and high heat to begin with – you’ll still get a great Maillard crust as long as the surface isn’t wet and the pan stays hot. So feel free to flip periodically (especially for thicker steaks), just make sure you give each side enough time on the heat to brown deeply. Both methods (single flip vs. frequent flips) can work – it’s more about personal workflow and ensuring continuous high heat contact.
Baste with Butter and Aromatics (Optional): This is the trick to steakhouse flavor. After the second side has seared for a minute or two, you can toss a couple tablespoons of butter into the pan along with aromatics like a crushed garlic clove and a sprig of fresh thyme or rosemary. Tilt the pan slightly and use a spoon to scoop the hot melted butter, continuously basting it over the steak for the final minute of cooking. Carbon steel’s lighter weight makes it easy to tilt and baste one-handed. This butter-basting not only adds rich flavor but also helps deepen the browning on the surface.
Finish to Desired Doneness: Searing alone will cook thinner steaks to roughly medium-rare or medium by the time both sides are well-browned. For thicker steaks, you may need to finish the cooking after searing the outside. You have two options:
- Lower the Heat: After a good sear on both sides, reduce the heat and continue to cook the steak in the pan, flipping as needed, until it reaches your target internal temperature (e.g. ~130°F for medium-rare, ~140°F for medium). This is essentially a stove-top finish. Keep basting during this phase to prevent drying out.
- Oven Finish: For a more controlled result, especially with steaks over 1.5 inches thick, move the pan to a preheated oven (around 375–400°F) after searing. Because carbon steel pans are oven-safe, you can transfer directly to the oven. Roast the steak for a few extra minutes until it hits the desired internal temp. This method helps cook the center without risking burning the crust. (Use an oven mitt – the pan will be very hot!)
- Rest Before Serving: Once your steak is done, move it to a cutting board and let it rest for 5–10 minutes. This is crucial – it allows the juices to redistribute and the interior to finish cooking gently. A rest ensures your steak stays juicy. Meanwhile, you can make a quick pan sauce in that same carbon steel pan using the browned bits (fond) left behind – deglaze with a splash of wine or broth, swirl in butter, and you have a delicious sauce to drizzle over the steak.
By following these steps, you’ll get a steak with a deeply caramelized crust and a tender interior. The carbon steel pan’s excellent heat retention and seasoning will have effectively mimicked a steakhouse grill or cast iron, but with easier handling. Many culinary experts agree that for indoor cooking, a carbon steel skillet is among the best pans for steak you can use, delivering superior searing and flavor.
Searing Chicken: Crispy Skin & Juicy Meat
When it comes to poultry, the goal is usually crispy, golden-brown skin and moist meat. Whether you’re cooking chicken breasts, thighs, or even a spatchcocked chicken, a carbon steel pan provides the high heat and even browning you need. The challenge with chicken is rendering the fat in the skin enough to crisp it, while cooking the meat through without drying. Here’s how to master searing chicken:
Use Bone-In, Skin-On Pieces: You’ll get the best flavor and sear with skin-on chicken cuts. Thighs are a favorite because they’re more forgiving (higher fat content), but skin-on breasts or drumsticks work too. If using boneless skin-on pieces (like many thighs are sold), those will cook a bit faster than bone-in. Whichever you choose, ensure the skin is very dry before it hits the pan (pat with towels; even refrigerate the chicken uncovered for 30 minutes to dry the skin further, similar to fish prep).
Season and Temper: Season the chicken with salt and pepper. You can season under the skin as well for more flavor. Let the chicken sit at room temp for 20–30 minutes if you can (especially larger pieces). This takes the chill off and promotes even cooking. A room-temp, dry piece of chicken is less likely to stick initially, because sudden temperature shock can make protein bonds tighten and grab the pan.
Consider Starting in a Cold Pan (for Thighs): Here’s a pro technique specifically for rendering chicken skin: start the chicken in a cold pan, skin-side down, then gradually heat it. Some chefs swear by this method to get ultra-crispy skin. By starting cold and then using medium heat, the fat under the skin has time to slowly render out without immediately scorching the skin. Brass & Steel’s carbon steel pan, being thick and even-heating, works wonderfully for this slow render technique too. If you try this: place the seasoned thighs skin-down in the pan before heating, then turn on medium heat and let them cook gently. You’ll notice the fat melting out and the skin gradually turning golden.
Standard Hot Pan Method: The more common approach is to preheat the pan (medium-high), add a bit of oil, and lay the chicken skin-side down once the oil is hot. You should hear a moderate sizzle. Then immediately turn the heat down to medium or medium-low. Chicken, unlike steak, often benefits from a slightly gentler sear because the skin needs time to render its fat. Too high a heat and the skin will brown (or burn) before the fat has rendered, leaving it less crispy. Medium heat for a longer time is key to perfectly crispy skin.
Sear Skin-Side Down – and Be Patient: This is where many people go wrong – they flip too soon. Do not move the chicken for a good while. Allow the skin to slowly crisp up and the fat to render out. For bone-in thighs, this can take about 10-15 minutes on medium heat; for breasts, perhaps 7-10 minutes. The skin will naturally release from the pan when it’s ready to flip. If you try to lift the chicken and the skin is still sticking, it likely needs more time (or your heat was too low at the start). As Bon Appétit’s chefs advise, bone-in, skin-on chicken should sear about 10 minutes undisturbed on the skin side – patience will be rewarded with ultra-crispy skin. If you notice only parts of the skin are touching the pan (sometimes uneven pieces), you can press down lightly with a spatula to ensure full contact, but generally just let it be.
Finish Searing the Other Side: Once the skin is deeply golden brown and releases easily, flip the chicken over. By now a lot of the cooking is done on the skin side. The second side will need less time – maybe another 5 minutes for thighs, or until the internal temperature hits a safe doneness (165°F in the thickest part of the meat, per FDA, though thighs are often even better around 175°F since they’re fattier). If it’s a thick bone-in breast, you might sear the flesh side for 3-4 minutes and then finish in the oven for even cooking.
Use the Oven for Thick Cuts: Just like with steak, an oven finish can be helpful for larger chicken pieces. After getting a good skin sear on the stovetop, you can transfer the carbon steel pan to a 375–400°F oven to let the chicken bake through. This is especially useful for bone-in chicken breasts or whole small game hens. The skin stays on top, crisping, while the oven’s heat cooks the meat evenly. Since carbon steel pans have no problem going into a hot oven, this method is easy – and it keeps the skin side up the whole time (you actually might not need to flip at all; one method is searing skin-side down in the pan, then moving the pan to the oven with the skin-side still down, and only flipping to skin-side up near the end to re-crisp if needed).
Baste and Aromatics (Optional): In the last couple of minutes of cooking (either on the stovetop or once you bring the pan out of the oven), you can toss in a knob of butter, some garlic, and herbs (like rosemary/thyme) just as you would with steak. Baste the chicken with the garlicky butter to enhance flavor. This is especially great for chicken breast, which can always use a bit more fat and flavor. Spoon the hot butter over the skin repeatedly – it will sizzle and deepen the color of the crust. Just be careful as chicken can spit some oil as the skin was rendering.
Check Doneness: Use an instant-read thermometer if you have one. Thighs are forgiving and taste great even up to 175°F. Breasts you’ll want to hit around 160°F then rest (carryover cooking will bring it to 165°F). If you don’t have a thermometer, poke the meat – the juices should run clear, not pink, when fully cooked.
Rest Briefly: Let the seared chicken rest for about 5 minutes before cutting or serving. This helps the juices redistribute (especially for larger pieces) so the meat stays moist. Meanwhile, don’t waste the fond (the browned bits) in the pan: deglaze the pan with a bit of stock or wine, scrape up those flavorful bits, and you have a quick jus or pan sauce to spoon over the chicken.
With these techniques, you’ll consistently get chicken with crispy skin and juicy meat. A carbon steel skillet is ideal here because it provides the even, steady heat needed to render fat properly. Plus, its oven-safe build and excellent heat retention make it easy to go from stovetop searing to oven roasting. Brass & Steel’s carbon steel pans, for example, have outstanding heat distribution for uniform browning and no rivets, so the entire cooking surface stays smoothly searing your food. Once you taste a thigh or breast seared like this, you’ll never suffer through rubbery skin or dry chicken again.
Pan-Searing Fish with Crispy Skin (Without Sticking)
Searing fish, especially fillets with skin, can be intimidating. Fish is delicate, and the skin has a bad reputation for sticking to pans. However, with the right technique (and a well-seasoned carbon steel pan), you can achieve shatteringly crispy fish skin and tender flesh that releases easily. Many professional chefs actually prefer carbon steel for fish for its ability to get very hot and develop a nonstick seasoning – exactly what we need for fish. Let’s go step by step:
Choose the Right Pan and Prep: First, ensure your carbon steel pan is very clean and has a good layer of seasoning. Any burnt-on bits or poorly seasoned spots can grab the fish skin. If in doubt, give your pan a quick re-season or use a little extra oil. As Serious Eats notes, your best options for crisp fish are cast iron or carbon steel – you want that slightly risky surface because nonstick pans just won’t get the skin as crisp. Also, ventilation is good here – searing fish can get smoky due to high heat.
Prepare the Fish Fillets: Pat the fish fillet completely dry on all sides – especially the skin. This cannot be overemphasized. Moisture left on fish skin has to evaporate before the skin can crisp, which wastes energy and time, often resulting in stuck or soggy skin. For extra assurance, you can use the chef’s trick: take the back of a knife and gently scrape the skin side of the fish, squeezing out excess water, then pat dry again. If you have time, place the fillets uncovered in the fridge for 20-30 minutes (skin side up) – this air-drying helps even more. Right before cooking, season the fish. Sprinkle salt (and pepper if desired) on both sides, but do this only at the last minute so salt doesn’t draw out new moisture from the fish.
Heat the Pan to Very Hot: Fish requires a different heating strategy than chicken. Here, you actually want the pan and oil extremely hot initially. Heat your carbon steel pan on medium-high until thoroughly hot, then add a high smoke-point oil and heat it until you see it shimmer and even a few wisps of smoke. The oil needs to be almost at its smoking point. Why? Because you want the fish skin’s proteins to coagulate and brown instantly on contact, which will prevent them from bonding to the metal. As one technique, hold the fillet by one end and test the oil by touching just a corner of the fish to the pan – if it immediately sizzles and the fish slides around easily, the pan is ready. This “dip test” is a great way to ensure you’ve got the right heat before committing the whole fillet to the pan.
Lay the Fish in Skin-Side Down: Gently place the fish fillet into the pan skin-side down, laying it away from you to avoid any hot oil splashes. The moment the fish hits, it should sizzle loudly. If it sticks at all when you try to place it, pull back – it means the pan wasn’t hot enough or well-seasoned enough. In such a case, you can quickly remove the fish and further heat or even re-season the pan (by heating oil to smoke and wiping out). But if you followed the previous step, it should glide on the oil. Immediately after laying it down, press the fillet flat with your spatula (or use another smaller pan to press) for about 10 seconds. Fish skin has a tendency to curl up when it hits high heat, which can lead to uneven contact and patchy crisping. Pressing it down ensures the skin stays flush with the pan for an evenly crispy result.
Moderate the Heat After Initial Sear: Once the fish is in and the skin has gotten a good blast of heat for a minute or so, you can turn the heat down to medium. This is important to allow the fish to cook through gently. For example, when searing salmon, many chefs will heat the pan high, add the fish, then immediately reduce to medium or medium-low to let the skin crisp steadily without burning. With the heat slightly lowered, let the fish cook on the skin side for the majority of the time. You’ll notice the color of the fillet slowly changing from the bottom up as it cooks. Do not move the fish during this phase.
Let the Skin Crisp and Release: Just like with meats, the fish will eventually release from the pan when the skin is properly crisped. A well-seasoned carbon steel pan plus the right heat will essentially make the pan act nonstick once the skin is browned. As the Sitka Seafood experts describe, once the fish is well cooked on the skin side, it will lift off easily. This usually takes about 4-7 minutes, depending on thickness (thinner fillets like sea bass might be 4 minutes; a thick salmon fillet could be 6-7 minutes on skin side). You want to cook it most of the way on the first side – until the flesh is mostly opaque up the sides and you see a nice brown edge at the bottom.
Flip and Finish Briefly: Using a fish spatula (thin, flexible spatula) or similarly gentle tool, carefully slide under the fish and flip it over. The skin should be rigid and ultra-crispy now. Cook the other side for a very short time – often just 30 seconds to 1 minute is enough for a fillet, since by now it’s almost done. The goal on the second side is just to kiss the flesh with heat and finish cooking the center. Overcooking fish is a common mistake; remember it will also continue to cook a bit from residual heat after you remove it. If you’re unsure, check the internal temp (for fish, ~130°F is medium, 140°F well-done; many enjoy salmon at 125°F medium-rare). The flesh should flake easily and be opaque. Thin fillets might not even need a flip if they cooked through on the skin side – but usually flipping for a few seconds ensures the top is warm and slightly seared.
Serve Immediately: Unlike big cuts of meat, fish doesn’t need to rest and in fact is best served right away, especially to preserve the crispness of the skin. Have your plates ready. If you want to be chef-fancy, you can spoon a quick pan sauce around the fish or a squeeze of lemon. But do pour off any excess oil from the pan first to avoid a greasy sauce; the fond left from fish is minimal compared to meats.
Some extra tips: If you’re searing a very thick piece of fish and worry about it cooking through, you can also finish it in the oven (at 400°F for a few minutes) after crisping the skin side on the stovetop. Carbon steel pans make this easy since you just transfer the whole pan to the oven. Another tip – don’t overcrowd the pan with fish; do it in batches if necessary, because crowding lowers the pan temperature and causes steaming.
When done correctly, pan-seared fish in a carbon steel skillet will have a gloriously crunchy skin – practically a fish chip – with tender, moist flesh. And it will not be stuck to the pan! Remember, the keys are super dry skin, very hot pan/oil initially, and a well-seasoned cooking surface. The advantage of carbon steel here is that you can safely get it ripping hot (unlike nonstick pans which should never be heated empty on high heat) and its seasoned surface actually improves with each use. Even a stainless steel pan can give good results if you nail the technique, but carbon steel’s slight natural nonstick from seasoning provides extra insurance. No wonder seasoned chefs reach for their carbon steel pan when the goal is a perfect fish sear.
Bringing It All Together
By now, it’s clear that achieving the best sear on steak, chicken, and fish is a combination of proper technique and the right equipment. A carbon steel pan, like the expertly crafted ones from Brass & Steel, sets you up for success with its high-performance features – from fast, even heating to a durable seasoning that only gets better with time. We’ve covered how to harness that performance for each protein:
For steaks, a carbon steel skillet provides the blistering heat and crust development needed for a steakhouse-quality sear, all while being easier to handle than cast iron. You can confidently crank up the heat, knowing the pan can take it, and even pop it in the oven for a perfect finish. The result: a caramelized crust and juicy center that will make you wonder why you ever paid steakhouse prices.
For chicken, the pan’s versatility shines. It can render chicken skin to crispy perfection over moderate heat, and then seamlessly transition to the oven to finish cooking evenly. The even heat distribution of a quality carbon steel pan ensures every piece of skin gets golden, not just the center of the pan. Plus, with no synthetic coatings, you can spoon in pan sauce ingredients or acids without fear – just deglaze and enjoy that extra flavor.
For fish, your carbon steel pan proves itself as a true searing specialist, delivering restaurant-grade crispy skin that would be hard to achieve in a standard nonstick. The pan’s responsiveness lets you get it hot enough to sear yet quickly cool down to gentle cook the fish through. And because Brass & Steel’s pans have such a smooth, rivet-free cooking surface, delicate fillets slide right out intact, leaving nothing but a bit of savory fond behind.